VoIP Settings
822
SonicOS 5.8.1 Administrator Guide
Note You must select Bandwidth Management on the Network > Interfaces page for the WAN
interface before you can configure bandwidth management for network access rules.
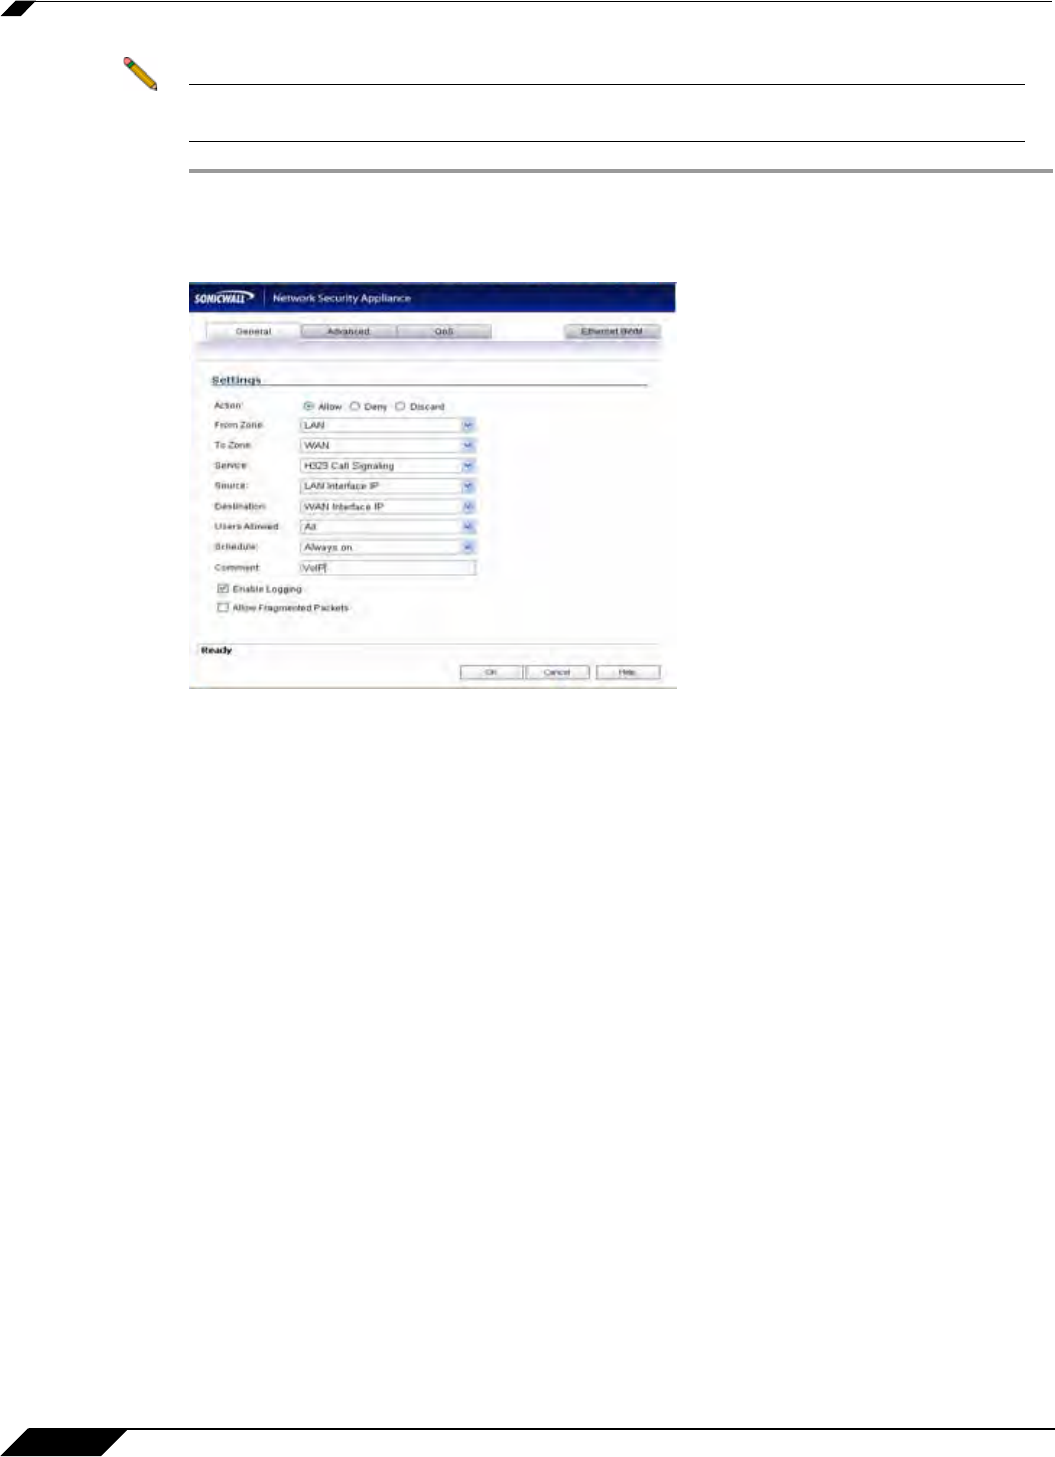
Step 1 To add access rules for VoIP traffic on the SonicWALL security appliance:
Go to the Firewall
> Access Rules page, and under View Style click All Rules.
Step 2 Click Add at the bottom of the Access Rules table. The Add Rule window is displayed.
Step 3 In the General tab, select Allow from the Action list to permit traffic.
Step 4 Select the from and to zones from the From Zone and To Zone menus.
Step 5 Select the service or group of services affected by the access rule from the Service list.
• For H.323, select one of the following or select Create New Group and add the following
services to the group:
–
H.323 Call Signaling
–
H.323 Gatekeeper Discovery
–
H.323 Gatekeeper RAS
• For SIP, select SIP
Step 6 Select the source of the traffic affected by the access rule from the Source list. Selecting
Create New Network displays the Add Address Object window.
Step 7 If you want to define the source IP addresses that are affected by the access rule, such as
restricting certain users from accessing the Internet, select Range in the Type: pulldown menu.
The enter the lowest and highest IP addresses in the range in the Starting IP Address: and
Ending IP Address fields.
Step 8 Select the destination of the traffic affected by the access rule from the Destination list.
Selecting Create New Network displays the Add Address Object window.
Step 9 From the Users Allowed menu, add the user or user group affected by the access rule.
Step 10 Select a schedule from the Schedule menu if you want to allow VoIP access only during
specified times. The default schedule is Always on. You can specify schedule objects on the
system > Schedules page.
Step 11 Enter any comments to help identify the access rule in the Comments field.
Step 12 Click the Bandwidth tab.
