Network > Routing
330
SonicOS 5.8.1 Administrator Guide
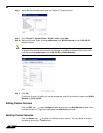
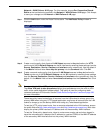
Step 7 Enter the Metric for the route. The default metric for static routes is one. For more information
on metrics, see the “Policy Based Routing” section on page 328
Step 8 (Optional) Select the Disable route when the interface is disconnected checkbox to have
the route automatically disabled when the interface is disconnected.
Step 9 (Optional) The Allow VPN path to take precedence option allows you to create a backup route
for a VPN tunnel. By default, static routes have a metric of one and take precedence over VPN
traffic. The Allow VPN path to take precedence option gives precedence over the route to
VPN traffic to the same destination address object. This results in the following behavior:
• When a VPN tunnel is active: static routes matching the destination address object of the
VPN tunnel are automatically disabled if the Allow VPN path to take precedence option
is enabled. All traffic is routed over the VPN tunnel to the destination address object.
• When a VPN tunnel goes down: static routes matching the destination address object of
the VPN tunnel are automatically enabled. All traffic to the destination address object is
routed over the static routes.
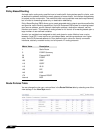
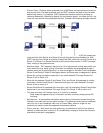
Step 10 The Probe, Disable route when probe succeeds, and Probe default state is UP options are
used to configure Probe-Enabled Policy Based Routing. See the following “Probe-Enabled
Policy Based Routing Configuration” section on page 330 for information on their configuration.
Step 11 Click OK to add the route.
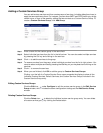
Probe-Enabled Policy Based Routing Configuration
When configuring a static route, you can optionally configure a Network Monitor policy for the
route. When a Network Monitor policy is used, the static route is dynamically disabled or
enabled, based on the state of the probe for the policy.
Step 1 Configure the static route as described in “Static Route Configuration” on page 329.
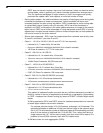
Step 2 In the Probe pulldown menu select the appropriate Network Monitor object or select Create
New Network Monitor object... to dynamically create a new object. For more information, see
“Network > Network Monitor” on page 425.
Step 3 Typical configurations will not check the Disable route when probe succeeds checkbox,
because typically administrators will want to disable a route when a probe to the route’s
destination fails. This option is provided to give administrators added flexibility for defining
routes and probes.
Step 4 Select the Probe default state is UP to have the route consider the probe to be successful (i.e.
in the “UP” state) when the attached Network Monitor policy is in the “UNKNOWN” state. This
is useful to control the probe-based behavior when a unit of a High Availability pair transitions
from “IDLE” to “ACTIVE,” because this transition sets all Network Monitor policy states to
“UNKNOWN.”
Step 5 Click OK to apply the configuration.
A Route Policy Example
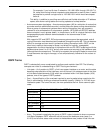
The following example walks you through creating a route policy for two simultaneously active
WAN interfaces. For this example, a secondary WAN interface needs to be setup on the X3
interface and configured with the settings from your ISP. Next, configure the security appliance
for load balancing by checking the Enable Load Balancing on the


