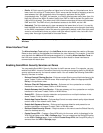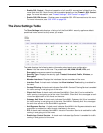
Network > Zones
289
SonicOS 5.8.1 Administrator Guide
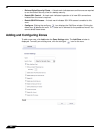
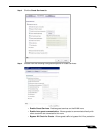
To configure the zone, perform the following steps:
Step 1 Type a name for the new zone in the Name field.
Step 2 Select a security type Trusted, Public or Wireless from the Security Type menu. Use Trusted
for zones that you want to assign the highest level of trust, such as internal LAN segments. Use
Public for zones with a lower level of trust requirements, such as a DMZ interface. Use
Wireless for the WLAN interface.
Step 3 If you want to allow intra-zone communications, select Allow Interface Trust. If not, select the
Allow Interface Trust checkbox.
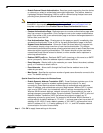
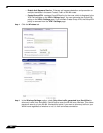
Step 4 Select which of the following SonicWALL Security Services you want to enforce on the zone:
–
SonicWALL Content Filtering Service – Enforces content filtering on multiple
interfaces in the same Trusted, Public and WLAN zones. To apply a Content Filtering
Service (CFS) policy to the zone, select the policy from the CFS Policy pull-down
menu.
–
SonicWALL Enforce Client Anti-Virus Service – Enforces Client Anti-Virus
protection on multiple interfaces in the same Trusted, Public or WLAN zones, using the
SonicWALL Client Anti-Virus client on your network hosts.
–
Enable Gateway Anti-Virus Service – Enforces gateway anti-virus protection on your
SonicWALL security appliance for all clients connecting to this zone. SonicWALL
Gateway Anti-Virus manages the anti-virus service on the SonicWALL appliance.
–
Enable Intrusion Protection Service (IPS) – Enforces intrusion detection and
prevention on multiple interfaces in the same Trusted, Public or WLAN zones.
–
Enable App Control Service – Enforces App Control to create network policy object-
based control rules to filter network traffic flows.
–
Enable Anti-Spyware Service – Enforces anti-spyware detection and prevention on
multiple interfaces in the same Trusted, Public or WLAN zones.
–
Enforce Global Security Clients – Requires users on this zone to use the Global
Security client for desktop security.
–
Create Group VPN – Automatically creates a SonicWALL GroupVPN Policy for this
zone. You can customize the GroupVPN Policy in the VPN > Settings page.
Caution Unsetting the Create Group VPN checkbox will remove any corresponding GroupVPN
policy.
–
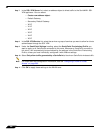
Enable SSL Control – Enables SSL Control on the zone. All new SSL connections
initiated from that zone will now be subject to inspection. Note that SSL Control must
first be enabled globally on the Firewall > SSL Control page. For more information,
see “Firewall Settings > SSL Control” on page 777.
–
Enable SSLVPN Access – Enables users to establish SSL VPN connections to this
zone. For more information, see “SSL VPN” on page 931.
Step 5 Click OK. The new zone is now added to the SonicWALL security appliance.
Deleting a Zone
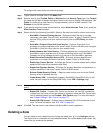
You can delete a user-created zone by clicking the delete icon in the Configure column.
The Delete icon is unavailable for the predefined zones. You cannot delete these zones. Any
zones that you create can be deleted.


