SonicPoint > RF Management
589
SonicOS 5.8.1 Administrator Guide
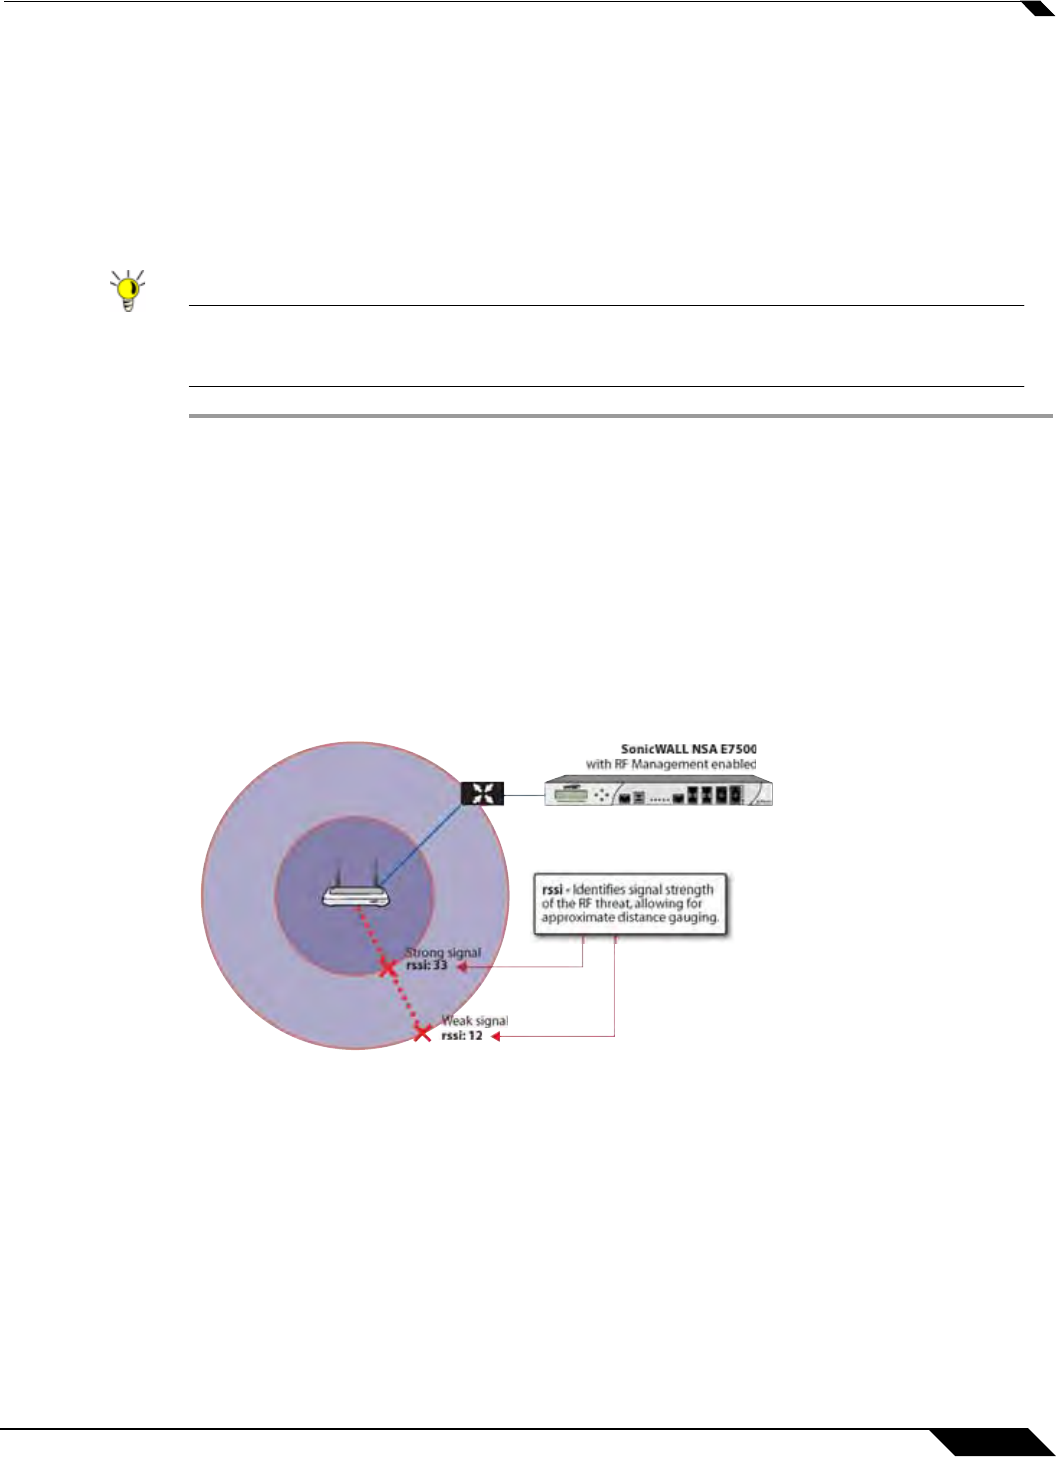
Using RSSI to Determine RF Threat Proximity
This section builds on what was learned in the “Using Sensor ID to Determine RF Threat
Location” section on page 588. In the Discovered RF Threat Stations list, the Rssi field
indicates the signal strength at which a particular Sonic Point is detecting an RF threat.
The Rssi field allows you to easily determine the proximity of an RF threat to the SonicPoint
that is detecting that threat. A higher Rssi number generally means the threat is closer to the
SonicPoint.
Tip It is important to remember that walls serve as barriers for wireless signals. While a very
weak Rssi signal may mean the RF threat is located very far from the SonicPoint, it may also
indicate a threat located near, but outside the room or building.
Step 1 Navigate to the SonicPoint > RF Management page in the SonicWALL Management Interface.
Step 2 In the Discovered RF Threat Stations table, locate the Sensor and Rssi for the SonicPoint
that is detecting the targeted RF threat and record these numbers.
Step 3 Navigate to the SonicPoint > SonicPoints page.
Step 4 In the SonicPoints table, locate the SonicPoint that matches the Sensor number you recorded
in Step 2.
Step 5 Record the MAC address for this SonicPoint and use it to find the physical location of the
SonicPoint.
A high Rssi usually indicates an RF threat that is closer to the SonicPoint. A low Rssi can
indicate obstructions or a more distant RF threat.
E7500
Network Security Appliance
