6.4 CD Measurement Function (Option)
6 - 96
(4) Successive Auto Measurement
(a) Set Multiple in the measurement parameters the same as for auto measurement, then
successive auto measurement can be achieved. Click Set button on the CD
Measurement window and measurement cursors as for auto measurement will appear.
(b) Drag the measurement cursor box with the mouse as in auto measurement, align the
cursors with the part to be measured, then click Measure button and the measured
result will appear.
(c) In this status, click the Set button to display the measurement cursors, align the
cursors with the next part to be measured, then click Measure button and the 2nd
measured result will be displayed following the 1st measured result.
(d) In the same way, click Set button and set the cursors, then click Measure button and
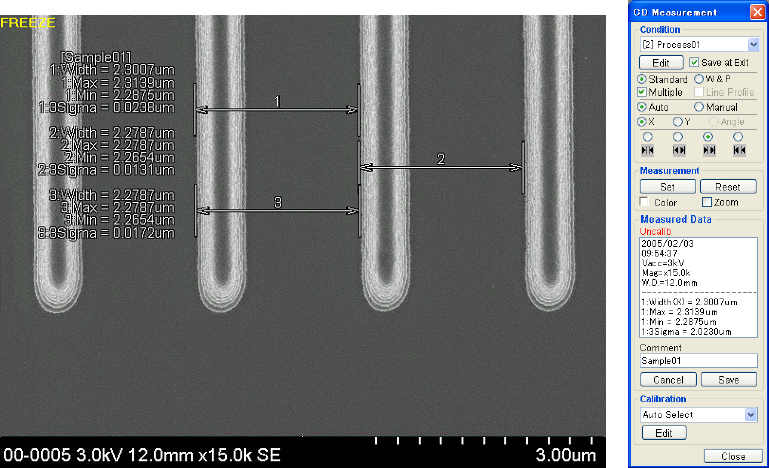
successive measurement can be achieved as shown in Fig. 6.4-26. In the case of
auto measurement, a maximum of four successive measurements is possible.
(e) Successive auto measurements upon changing X and/or Y midway is also possible.
Fig. 6.4-26 Successive Auto Measurement Results
(5) Width & Pitch Manual Measurement
(a) Set the measurement type to W&P, measurement mode to Manual and measuring
direction to X or Y, then width and pitch can be simultaneously measured manually.
(b) Click Set button on CD Measurement window. The measurement cursors will appear.
