6.4.5
6 - 91
6.4.5.6 Measurement Operation
The following six kinds of measurement are mainly available.
• Manual measurement
• Successive manual measurement
• Auto measurement
• Successive auto measurement
• Width & pitch manual measurement
• Width & pitch auto measurement
(1) Manual Measurement
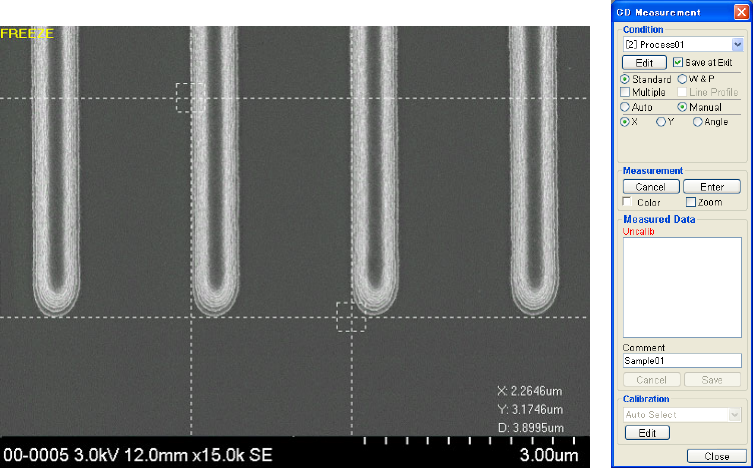
(a) With the measurement type at Standard, measurement mode at Manual and
measuring direction at X or Y, click the Set button on CD Measurement window, and
measurement cursors as shown in Fig. 6.4-19 will appear.
Fig. 6.4-19 Manual Measurement Cursor Display
(b) Drag with the mouse the box located on the cursor intersecting point, and align the
cursor with the part to be measured. Even in this status, the measured values
(horizontal, vertical, slope directions) can be read out.
(c) Click the Enter button, and the measured result can be saved as indicated in
Fig. 6.4-20. And if the present SEM parameters match the calibration parameters,
the calibrated measurement result will be displayed.
