


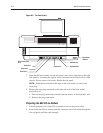


Installation HĆ11
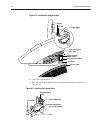
e. Pull the paper from under the platen and push it through the slot in the
printer cover.
f. Push the printer lever down.
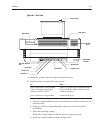
35. Close the printer cover:
a. Pull up the paper spool.
b. Insert the paper into the paper slot on the spool and turn three or four
rotations. Press
Paper Advance if there is not enough paper.
c. Push down the spool.
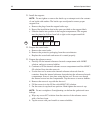
36. Access the Menu screen and set up your system.
Refer to System Administration in Section 5 for more information about setting
up the system.
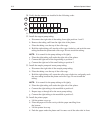
37. Initiate a prime sequence from the Menu screen to remove bubbles from the
reagent lines:
a. Select
2 Maintenance and press Enter.
b. Select 3 Prime and press Enter.
c. Select All and press Enter.
d. Press Done.
e. Watch the movement of wash solution to verify that the wash reagent flows
through the system during the wash sequence that automatically follows the
prime sequence.
38. Verify the gas flow rates for cal gas and slope gas:
a. Access the Valves Test from the Menu screen.
b. Select
Cal Gas and press Start Test.
c. Insert an aspiration adapter into the sample port.
d. Immerse the open end of the aspiration adapter into a small container of
reagent water.
e. Press Start Test.
f. Verify that a steady stream of bubbles flows into the water.
g. Press
Stop Test.
h. Verify that the bubbles stop flowing.
i. Repeat steps b through h for slope gas.
j. Remove the aspiration adapter.
k. Press
Exit Test.
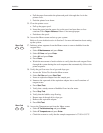
39. Access the Temperature test from the Menu screen:
a. Select
3 Troubleshooting and press Enter.
b. Select 2 Temperature and press Enter.
c. Check the screen to verify that the sample temperature is 37.00 ± 0.15°C.
2
Menu Code
3
3
Menu Code
2