


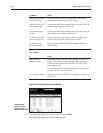
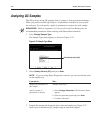

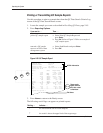


If you . . . Then . . .
use the keypad or
keyboard
type the File Number and press Enter.
use the optional
bar code scanner
scan the bar code label on the QC ampule.
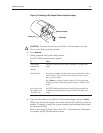
NOTE: To ensure accurate sample identification, scan QC
ampule bar codes only after selecting Quality Control (QC)
from the Sample Type screen or when the QC File Information
form is displayed.
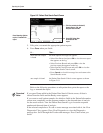
turn Auto ID on system automatically determines which file and completes the
QC File Information screen.
NOTE: If the pH or pCO
2
sensor or tHb is disabled or not in
calibration, Auto ID does not work.
do not complete
the screen
system stores results in QC File 14 and a message that contains
the sequence number and date and time of analysis is placed in
the status log. Refer to Editing QC Data, page 2-48, to move
the results to the correct file.
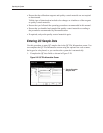
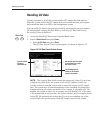
2. Type the Operator ID and press Done .
If you want to change text in the QC File Information screen after you press
Done, press Edit QC Data. The QC File Information screen reappears. Make
your changes and press
Done.
If you do not identify a QC file and you press Done, a message box appears
prompting you to identify the QC file. Press OK to return to the QC File
Information screen and complete the File Number field.
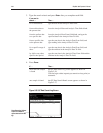
If you do not identify the QC file and press Done within 5 minutes, the QC sample
results are stored in the Discarded Data File. The system returns to the Ready
screen. Refer to Recalling QC Data, page 2-45, for instructions to recall, edit, and
print QC sample data after results are stored.
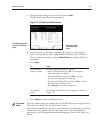
If you scan a bar code label that is not a QC ampule bar code, a message box
appears prompting you to scan a QC ampule bar code. Press OK to return to the
QC File Information screen and scan the correct QC ampule bar code label.
Procedural
Notes