


Installation HĆ9
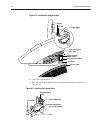
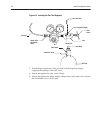
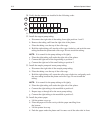
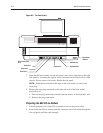
24. Install the reference sensor:
a. Open the measurement module door by pushing up on the latches located
on the lower corners to release the door, and then lifting the door up.
b. Push the spring-loaded latch to the right.
c. Verify that the O-rings are in place on both sides of the sensor.
d. Verify that the O-ring is in place on the left side of the spring-loaded latch.
e. Align the top of the reference sensor with the sensor contact.
f. Snap the body of the sensor down into place.
g. Ensure that the sensor O-rings are in place.
25. Fill the Cl
–
sensor:
a. Grasp the tab on the blank sensor. Pull it up and out of the measurement
module.
b. Remove the Cl
–
sensor from its package.
c. Unscrew the internal electrode and carefully set it aside on a lint-free
tissue.
d. Rinse the sensor body with 3 drops of the Na
+
, K
+
, Cl
–
, Ca
++
fill solution
and empty.
e. Slowly add the fill solution until the sensor is almost full.
f. Screw the internal electrode into place.
g. Tap the sensor with your knuckle to remove bubbles.
h. Wipe the sensor with a dry lint-free tissue.
i. Ensure that the O-ring is in place on the left side of the sensor.
j. Align the top of the sensor with the sensor contact.
k. Snap the body of the sensor down into place.
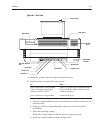
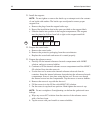
26. Connect the power cord to the AC wall outlet.
The system begins a power-up sequence. Wait for the Not Ready screen to
appear.
27. Verify that the sensors are almost full of fill solution. If any sensor is not filled
correctly, follow the procedure Filling the Measurement Sensors in Section 3,
using the appropriate fill solution.
NOTE:ĄĂThe Na
+
sensor should be full. The pH, K
+
, Cl
–
, and Ca
++
sensors
should be almost full.
28. Verify that each O-ring is correctly positioned.
29. Press down the tab on the spring-loaded latch to release it.
860850