


3Ć21Maintaining the System
3. Write the date installed in the space provided on the new reagent bottles.
NOTE: Do not remove or tighten the cap that contains the reagent septum.
Removing or tightening the cap damages the integrity of the reagent septum.
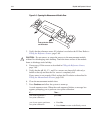
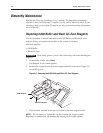
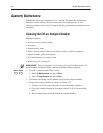
4. Remove the plugs from the caps of the new reagent bottles.
5. Insert the new reagent bottles into position on the reagent manifold.
6. Push the bottles to ensure that they fit tightly on the reagent fitting.
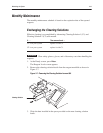
7. Press
Reset Levels.
The Reset Levels screen appears.
8. Select the reagent(s) that you replaced and press
Done.
A prime sequence starts followed by a wash sequence. When the wash
sequence finishes, the Ready screen appears.
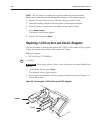
9. Perform a two-point calibration.
a. Press
Calibrate.
b. Select Two-point and press Enter.
c. Press Start Calibration.
Perform a two-point calibration after changing the reagents to ensure that the
reagents are acceptable and the system is functioning properly. You can analyze
quality control materials with the new reagents and compare the results with the
previous QC results after the system is recalibrated.
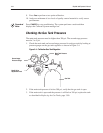
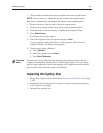
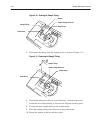
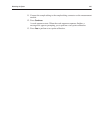
Inspecting the Capillary Seal
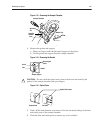
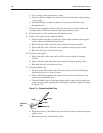
1. Remove the capillary seal as described in Replacing the Capillary Seal, page
3-100.
2. Inspect the seal for damage such as abrasion and cuts. Replace the capillary
seal if the seal is damaged.
3. Reinstall the capillary seal.
Procedural
Notes