3Ć50 Rapidlab 800 Operator's Manual
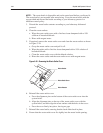
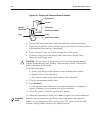
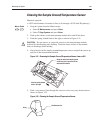
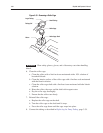
6. Ensure that the O-ring is in place. Replace the O-ring if it is worn or damaged.
CAUTION: Do not remove or return the sensors to the measurement module
without first discharging static buildup. Touch the inner surface of the module
frame to discharge static buildup.
NOTE: If the sensor does not insert easily into the measurement module, slide the
remaining sensors to the right to create more space.
7. Reinstall the sensor:
a. Gently align the top of the sensor with the sensor contact.
b. Snap the body of the sensor down into place.
c. Press the tab on the spring-loaded latch to release the latch.
8. Close the measurement module door.
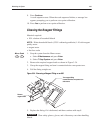
9. Press
Continue .
A wash sequence starts. When the wash sequence finishes, a message box
appears prompting you to perform a two-point calibration.
10. Press
No.
11. Allow the system to warm up for at least 15 minutes.
12. Check the sample path temperature from the Menu screen:
a. Select
3 Troubleshooting and press Enter.
b. Select
2 Temp/pAtm and press Enter.
c. Press Start Test.
d. Press Stop Test.
e. Check the screen for the sample path temperature.
f. If the temperature control system is off, press Reset Control.
g. Press
Exit Test.
13. Perform a two-point calibration from the Menu screen:
a. Select
1 Calibration and press Enter.
b. Select 2 Two-point and press Enter.
!
3
Menu Code
2
(from the Main Menu)
1
Menu Code
2
(from the Main Menu)


