


HĆ10 800 Series Operator's Manual
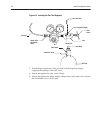
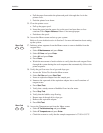
30. Verify that the sensors are installed in the following order:
pO
2
pCO
2
GND pH
Ref
pO
2
pCO
2
GND pH
Na
+
K
+
Ca
++
Cl
-
Ref
pO
2
pCO
2
GND pH
Na
+
K
+
Ca
++
Cl
-
RefTB4
TB4
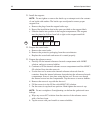
31. Close the measurement module door.
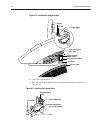
32. Install the reagent pump tubing:
a. Disconnect the right side of the tubing from right positions 1 and 2.
b. Remove the tubing cuff from the right side of the platen.
c. Place the tubing over the top of the roller cage.
d. Hold the right tubing cuff, turn the roller cage clockwise, and work the new
tubing between the platen and roller cage. Do not stretch the tubing.
NOTE:ĄĂIt is normal for the pump tubing to fit tightly.
e. Place the right tubing cuff under the right side of the platen.
f. Connect the right end of the large tubing to position 1.
g. Connect the right end of the small tubing to position 2.
33. Install the sample pump and waste pump tubing:
a. Disconnect the right side of the sample pump tubing.
b. Place the tubing over the top of the roller cage.
c. Hold the right tubing cuff, rotate the roller cage clockwise, and gently work
the new tubing between the platen and roller cage. Do not stretch the
tubing.
NOTE:ĄĂIt is normal for the pump tubing to fit tightly.
d. Place the right tubing cuff under the right side of the platen.
e. Connect the right tubing to the manifold at position 4.
f. Repeat steps a through d for the waste pump tubing.
g. Connect the right tubing to the manifold at position 5.
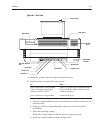
34. Install the printer paper:
a. Lift the printer cover up.
b. Place the paper roll in the cavity with the paper unrolling from
the bottom.
c. Lift the printer lever up.
d. Push the paper under the platen until it comes out of the other side in front.
840
850
860