Users and Groups
Polycom, Inc. 324
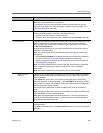
b To link this preset conference to an external audio conferencing bridge (for hosting audio-only
participants), in the Digits field enter the E.164 number for connecting to that bridge, and in the
IVR DTMF field enter any DTMF digits (such as an access code or PIN) to send to the audio
conferencing bridge after connecting (use p to specify a pause).
This capability requires a Polycom MCU with ISDN service.
c Under Dial-out Participants, add the participants to be called when the conference starts.
6 Click OK.
To edit one of a user’s conference rooms
1 Go to User > Users and select the user whose conference room you want to edit.
2 In the Actions list, click Manage Conf Rooms.
The Conference Rooms dialog box appears.
3 Select the conference room you want to edit and click Edit.
The Edit Conference Room dialog box appears.
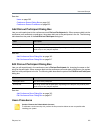
4 Modify the settings you want to change. See Edit Conference Room Dialog Box on page 317.
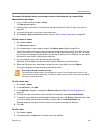
5 To set up this conference room for a preset dial-out conference (also known as anytime conference),
select Dial-out Presets and do the following:
a Ensure that this room or user has a chairperson passcode and that you’ve selected a conference
template that’s linked to a Polycom RealPresence Collaboration Server or RMX conference IVR
service and requires a chairperson to start the conference.
b To link this preset conference to an external audio conferencing bridge, in the Digits field enter
the E.164 number for connecting to that bridge, and in the IVR DTMF field enter any DTMF digits
(such as an access code or PIN) to send to the audio conferencing bridge after connecting (use
p to specify a pause).
This capability requires a Polycom MCU with ISDN service.
c Under Dial-out Participants, add the participants to be called when the conference starts.
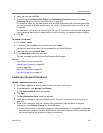
6 To turn of automatic dial-out temporarily without losing the configuration data, clear the Dial-out
Presets check box.
7 Click OK.
To delete one of a user’s custom conference rooms
1 Go to User > Users and select the user whose custom conference room you want to delete.
2 In the Actions list, click Manage Conf Rooms.
The Conference Rooms dialog box appears.
3 Select the conference room you want to remove and click Delete.
You can’t delete an enterprise conference room or a conference room created by the system for a
calendared meeting.
4 When prompted to confirm, click Yes.


