TELEDYNE API
Instrument Maintenance Technical Manual - M100E UV Fluorescence SO2 Analyzer
214
10.3.4. CHANGING CRITICAL FLOW ORIFICES
A critical flow orifice, located on the exhaust manifold maintains the proper flow rate of gas through the M100E
analyzer. Refer to section 10.3.2.1 for a detailed description of its functionality and location. Despite the fact this
these device is protected by sintered stainless steel filters, it can, on occasion, clog, particularly if the instrument
is operated without a sample filter or in an environment with very fine, sub-micron particle-size dust.
1. Turn off power to the instrument and vacuum pump.
2. Locate the critical flow orifice on the pressure sensor assembly (refer to Figure 3-3).
3.
Disco
nnect the pneumatic line.
4. Unscrew the NPT fitting.
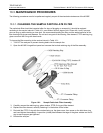
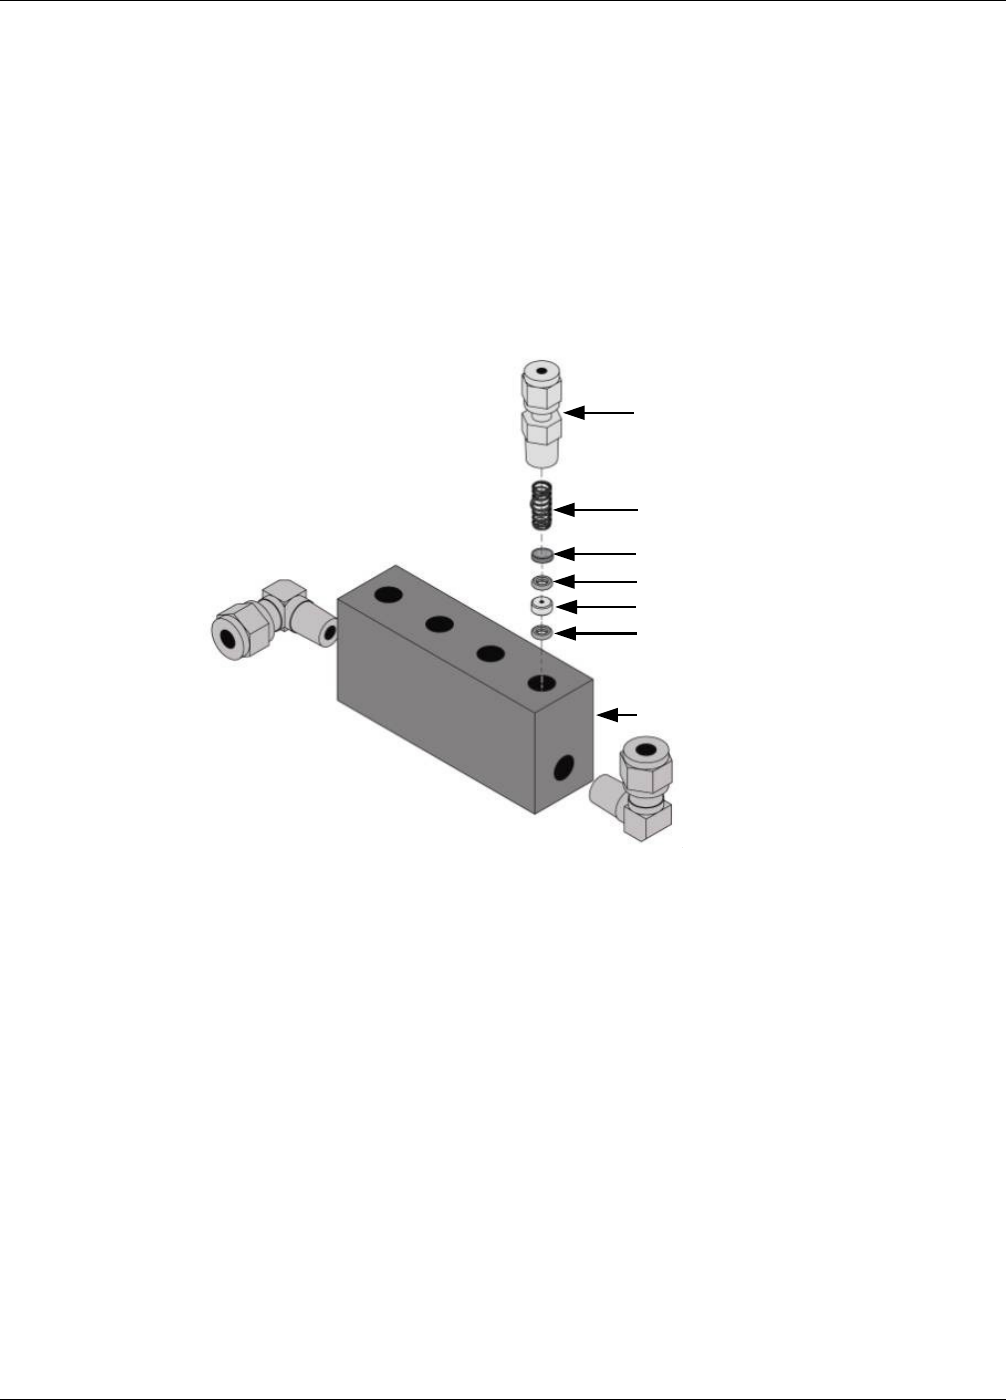
Gas Line fitting
Spring
Sintered Filter
O-Ring
Critical Flow Orifice
O-Ring
Vacuum Manifold
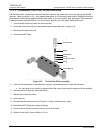
Figure 10-2: Critical Flow Orifice Assembly
5. Take out the components of the assembly: a spring, a sintered filter, two O-rings and the orifice.
You may need to use a scribe or pressure from the vacuum port to get the parts out of the manifold.
6. Discard the two O-rings and the sintered filter.
7. Replace the critical flow orifice.
8. Let the part dry.
9. Re-assemble the parts as shown in Figure 10-2 using a new filter and o-rings.
10.
Rein
stall the NPT fitting and connect all tubing.
11. Power up the analyzer and allow it to warm up for 60 minutes.
12. Perform a leak check (refer to Section 10.3.6).
04515F DCN6048


