Calibration Procedures Teledyne API M100E Analyzer Operation Manual
176
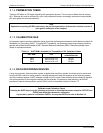
8.1.4. PERMEATION TUBES
Teledyne API offers an IZS option operating with permeation devices. The accuracy of these devices is about
±5%. Whereas this may be sufficient for quick, daily calibration checks, we strongly recommend using certified
SO
2
span gases for accurate calibration.
Note
Applications requiring US-EPA equivalency do not allow permeation devices to be used as sources of
span gas for calibration of the analyzer.
8.1.5. CALIBRATION GAS
All equipment used to produce calibration gases should be verified against standards of the National Institute for
Standards and Technology (NIST). To ensure NIST traceability, we recommend acquiring cylinders of working
gas that are certified to be traceable to NIST Standard Reference Materials (SRM). These are available from a
variety of commercial sources.
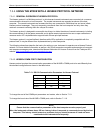
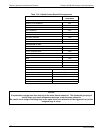
Table 8-1: NIST-SRM's Available for Traceability of SO
2
Calibration Gases
NIST-SRM
4
TYPE
NOMINAL
CONCENTRATION
1693a
1694a
1661a
Sulfur dioxide in N
2
Sulfur dioxide in N
2
Sulfur dioxide in N
2
50 ppm
100 ppm
500 ppm
8.1.6. DATA RECORDING DEVICES
A strip chart recorder, data acquisition system or digital data acquisition system should be used to record data
from the M100E’s serial or analog outputs. If analog readings are used, the response of the recording system
should be checked against a NIST traceable voltage source or meter. Data recording device should be capable
of bi-polar operation so that negative readings can be recorded. For electronic data recording, the M100E
provides an internal data acquisition system (iDAS), which is described in detail in Section 7.2.
Calibration a
nd Calibration Check
Pressing the ENTR key during the following procedure re-calculates the stored values for OFFSET and
SLOPE and alters the instrument’s calibration.
If you wish to perform a calibration CHECK, do not press ENTR and refer to Section 8.3.
04515F DCN6048


