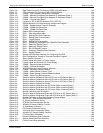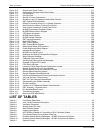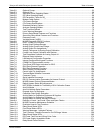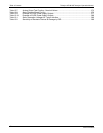
Table of Contents Teledyne API M100E Analyzer Operation Manual
viii
Figure 3-12: Functional Check .........................................................................................................................41
Figure 3-13: Reporting Range Verification.......................................................................................................43
Figure 3-14: Dilution Ratio Setup .....................................................................................................................44
Figure 3-15: SO
2
Span Gas Setting .................................................................................................................45
Figure 3-16: Zero/Span Calibration Procedure ................................................................................................46
Figure 5-1: Carrying Strap Handle and Rack Mount Brackets.......................................................................54
Figure 5-2: Current Loop Option Installed on the Motherboard .....................................................................55
Figure 5-3: Pneumatic Diagram of the M100E with Z/S Option Installed.......................................................57
Figure 5-4: Pneumatic Diagram of the M100E with IZS Options Installed.....................................................58
Figure 5-5: Concentration Alarm Relay..........................................................................................................60
Figure 5-6: Multidrop Card Seated on CPU above Disk on Module ..............................................................62
Figure 5-7: Ethernet Card...............................................................................................................................62
Figure 5-8: Rear Panel with Ethernet Installed ..............................................................................................63
Figure 5-9: Oxygen Sensor - Theory of Operation.........................................................................................64
Figure 5-10: Internal Pneumatics with O
2
Sensor ............................................................................................65
Figure 5-11: CO
2
Sensor Theory of Operation.................................................................................................66
Figure 5-12: Internal Pneumatics with CO
2
......................................................................................................67
Figure 5-13: CO
2
Sensor Option PCA Layout and Electronic Connections.....................................................68
Figure 6-1: Front Panel Display......................................................................................................................73
Figure 6-2: Viewing M100E TEST Functions .................................................................................................76
Figure 6-3: Viewing and Clearing M100E WARNING Messages ..................................................................77
Figure 6-4: SETUP – Enable Calibration Password Security ........................................................................79
Figure 6-5: SETUP – Enter Calibration Mode Using Password.....................................................................80
Figure 6-6: SETUP – Configuration Information ............................................................................................82
Figure 6-7: SETUP – Clock............................................................................................................................83
Figure 6-8: SETUP – Clock Speed Variable ..................................................................................................84
Figure 6-9: SETUP – Analog Output Connector Key.....................................................................................85
Figure 6-10: SETUP RNGE – Reporting Range Mode ....................................................................................87
Figure 6-11: SETUP RNGE – Single Range Mode..........................................................................................88
Figure 6-12: SETUP RNGE – Dual Range Mode ............................................................................................89
Figure 6-13: SETUP RNGE – Auto Range Mode ............................................................................................90
Figure 6-14: SETUP RNGE – Concentration Units Selection..........................................................................91
Figure 6-15: SETUP RNGE – Dilution Ratio ....................................................................................................92
Figure 6-16: SETUP – VARS Menu .................................................................................................................94
Figure 6-17: DIAG Menu ..................................................................................................................................96
Figure 6-18: DIAG – Signal I/O Menu ..............................................................................................................97
Figure 6-19: DIAG – Analog Output Menu .......................................................................................................98
Figure 6-20: DIAG – Analog I/O Configuration Menu.................................................................................... 101
Figure 6-21: DIAG – Analog Output Calibration Mode.................................................................................. 102
Figure 6-22: DIAG – Analog Output Calibration Mode – Single Analog Channel......................................... 103
Figure 6-23: DIAG – Analog Output – Auto Cal or Manual Cal Selection for Channels ............................... 104
Figure 6-24: Setup for Calibrating Analog Outputs ....................................................................................... 105
Figure 6-25: Analog Output – Voltage Adjustment........................................................................................ 106
Figure 6-26: Analog Output – Offset Adjustment .......................................................................................... 107
Figure 6-27: Setup for Calibrating Current Outputs ...................................................................................... 108
Figure 6-28: Analog Output – Zero and Span Value Adjustment for Current Outputs.................................. 109
Figure 6-29: DIAG – Analog Output – AIN Calibration.................................................................................. 110
Figure 6-30: DIAG – Optic Test..................................................................................................................... 111
Figure 6-31: DIAG – Electrical Test............................................................................................................... 112
Figure 6-32: DIAG – Lamp Calibration.......................................................................................................... 113
Figure 6-33: DIAG – Pressure Calibration .................................................................................................... 114
Figure 6-34: DIAG – Flow Calibration ........................................................................................................... 115
Figure 6-35: DIAG – Test Channel Output.................................................................................................... 116
Figure 7-1: SETUP – COMM Menu............................................................................................................. 119
Figure 7-2: COMM – Analyzer ID............................................................................................................... 120
Figure 7-3: Back Panel Connector Pin-Outs for RS-232 and COM2 in RS-232 Mode............................... 121
Figure 7-4: CPU Connector Pin-Outs for RS-232 and COM2 in RS-232 Mode.......................................... 122
Figure 7-5: CPU RS-485 Setup................................................................................................................... 123
04515F DCN6048


