


Configuration and Use Manual 7
Startup ConfigurationCalibrationBefore You Begin
Chapter 2
Startup
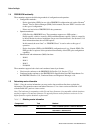
2.1 Overview
This chapter describes the procedures you should perform the first time you start the flowmeter. You
do not need to use these procedures every time you cycle power to the flowmeter.
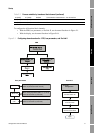
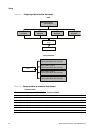
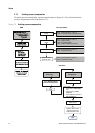
The procedures in this section will enable you to:
• Apply power to the flowmeter (Section 2.2)
• Set the node address (Section 2.3)
• Configure the AI block channels (Section 2.4)
• Set the I/O mode of the transmitter (Section 2.5)
• Configure the totalizer block mode (Section 2.6)
• Optional: Configure pressure compensation (Section 2.7)
• Optional: Configure temperature compensation (Section 2.8)
Note: All procedures provided in this chapter assume that you have established communication with
the transmitter and that you are complying with all applicable safety requirements. See Appendix C or
the documentation for your PROFIBUS host or configuration tool.
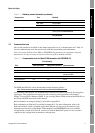
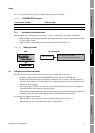
2.2 Applying power
Before you apply power to the flowmeter, close and tighten all housing covers.
Operating the flowmeter without covers in place creates electrical hazards that can cause death, injury,
or property damage. Make sure all covers are in place before applying power to the transmitter.
Turn on the electrical power at the power supply. The flowmeter will automatically perform
diagnostic routines. If the transmitter has a display, the status LED will turn green and begin to flash
when the transmitter has finished its startup diagnostics.
Note: If this is the initial startup, or if power has been off long enough to allow components to reach
ambient temperature, the flowmeter is ready to receive process fluid approximately one minute after
power-up. However, it may take up to ten minutes for the electronics in the flowmeter to reach thermal
equilibrium. During this warm-up period, you may observe minor measurement instability or
inaccuracy.