


77
5
5Managing Patients
Use the Patient Demographics window and its associated pop-up keys to admit, discharge, and transfer
(ADT) patients.
All patient demographic and ADT information is shared between the patient monitor and the
Information Center, for example, patients admitted to the monitor are automatically admitted to a
connected Information Center.
Admitting a Patient
The monitor displays physiological data and stores it in the trends as soon as a patient is connected.
This lets you monitor a patient who is not yet admitted. It is however important to admit patients
properly so that you can identify your patient on recordings, reports, and networked devices.
During admission you enter data that the monitor needs for safe and accurate operation. For example,
the patient category setting determines the algorithm the monitor uses to process and calculate some
measurements, the safety limits that apply for some measurements, and the alarm limit ranges.
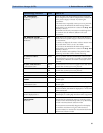
To admit a patient,
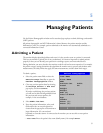
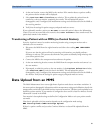
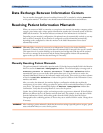
1 Select the patient name field or select the
Admit/Dischrge SmartKey to open the
Patient Demographics window.
2 Clear any previous patient data by selecting
the
Dischrge Patient or End Case
pop-up key and then Confirm.
If you do not discharge the previous patient,
you will not be able to distinguish data from
the previous and current patients, for
example, in the trend database.
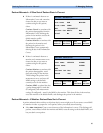
3 Select Admit Patient.
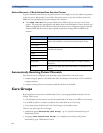
4 Enter the patient information: select each
field and use the on-screen keyboard or
choose from the pop-up list of alternatives to
input information. If a conventional
keyboard or a barcode scanner is connected to the monitor you can use this to enter patient
information.
–
Last name: Enter the patient’s last name (family name), for example Smith.
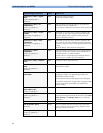
Last Name
First Name
MRN
Patient Cat.
Paced
Height
Weight
BSA (D)
Date of Birth
Age
Gender
Notes (1):
Notes (2):
Adult
No
Patient Demographics