Changing Monitor Settings 1 Basic Operation
31
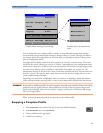
2 Select the device whose label you want to correct.
3 Use the measurement selection pop-up keys to resolve the conflict. Select either:
– Change Label to assign a different label to the conflicting label
– De-activate: to disable the conflicting device. It retains its label for future use but becomes
invisible to the monitor, as though it had been unplugged. When the device has been deactivated
the question marks under the measurement selection key will be replaced by XXX.
– Setup <Measurement label>: to enter the Setup menu for the measurement and change
the conflicting device’s label to a different label.
– Modify Driver (VueLink only) - change the VueLink device driver.
Changing Monitor Settings
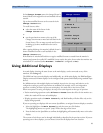
♦ To change monitor settings such as date and time, brightness, or QRS tone volume, select the
Main Setup SmartKey and then select the setting you want to change, or select User
Interface to enter a submenu where you can change user interface settings.
Adjusting the Screen Brightness
1 Select the Brightness SmartKey.
2 Select the appropriate setting for the screen brightness. 10 is the brightest, 1 is the least
bright.
Your monitor may be configured with a lower brightness for Standby mode and also (for battery
powered monitors) for transport to conserve battery power.These settings can only be changed in the
monitor’s Configuration Mode.
If you are using an MP80 or MP90 with an external display, the Brightness SmartKey does not
adjust the brightness of this display. See the instructions supplied with the external display for
instructions.
Adjusting Touch Tone Volume
The touch tone volume is the tone you hear when you select any field on the monitor screen. To adjust
the touch tone volume,
1 In the Main Setup menu, select User Interface
2 Select TouchToneVolume, then select the appropriate setting for the touch tone volume: 10 is
the loudest and 1 is the quietest. Selecting zero switches the touch tone volume off.
Setting the Date and Time
If your monitor is connected to an Information Center, the date and time are automatically taken from
this. Once it is set, the internal clock retains the setting even when you switch off the monitor.
WARNING Changing the date or time will affect the storage of trends and events.
1 Select the Date, Time screen element from the monitor’s info line to enter the Date, Time
menu.


