2 - 30
Alternately, click the area with the right button to increase or with the left button to decrease
magnification in a step.
(2) Preset button
The three preset magnifications are toggled through with each click of the button.
To set preset magnifications, open the Image tab of the Setup dialog window and input
desired values in the three Preset Magnification boxes.
A mark PM is indicated in the Magnification indicator area when the preset magnification is set.
(3) H/L button
To observe images at low magnifications of a few hundred times or lower, click the button. In
Low Mag mode, a mark LM is indicated in the Magnification indicator area. To return to High
Mag mode, click the button again.
2.3.5.7 Image recording
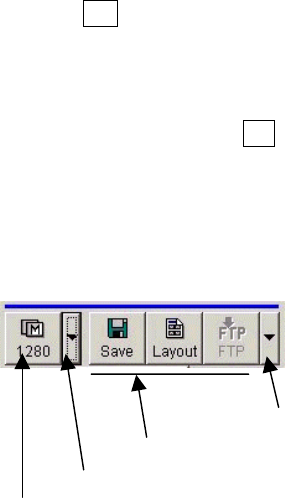
Record function select button
Record buttons
Capture resolution select button
Capure button
(1) Capture button
Captures an image with pre-specified image resolution and scanning speed.
Image resolution is selectable with the right side button and opening resolution list.
Select scanning speed on the Image tab of the Setup dialog window.
When capturing is started with TV or FAST1 scanning speed, frame integration is performed.
When started with SLOW1 to SLOW5 scanning speed a single frame Slow scan is performed.
Refer to <3.6.4 Image Capturing>
(2) Capture resolution select button
The button opens the following image resolution list. Select a resolution in the list.
The selected resolution value is indicated on the Capture button.
(3) Record buttons and Record function select button
There are five recording functions.


