3 - 34
3.5.5 Focus and Astigmatism Correction
Focus and astigmatism correction can be done manually and automatically.
Focus Monitor mode is available for manual focusing.
(1) General Method for Focusing and Astigmatism Correction
Focusing and astigmatism corrections are related to each other and need to be repeated
alternately. Use the following process to complete adjustments.
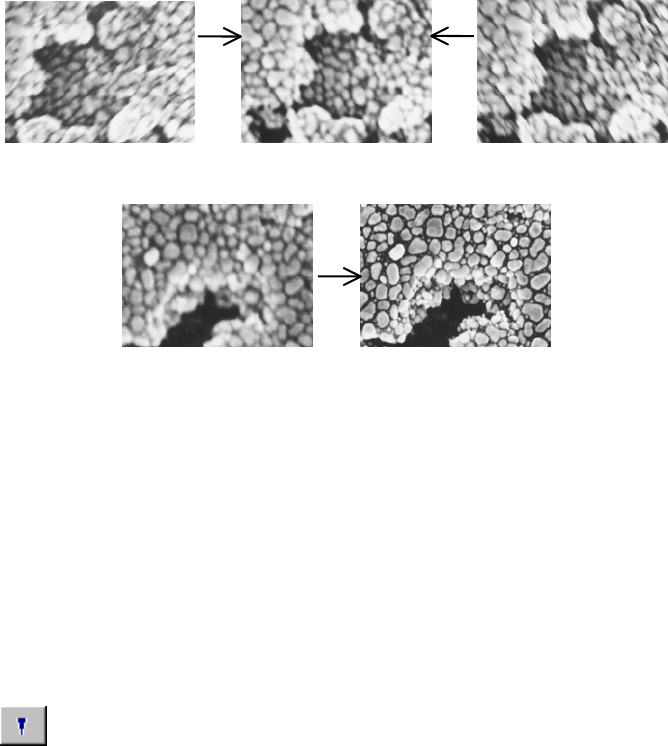
(a) Focus the image. When there is no astigmatism, the sharpest image is obtained at the
best-focus point.
When there is astigmatism, the image looks like its stretching in one direction at an
overfocused or underfocused condition, and uniformly focused at the best-focus point.
uniformly focused
(b) Adjust the stigmators X and Y alternately for the sharpest image.
(c) Focus again and check image drift and sharpness.
(d) Repeat steps (a) to (c) until adjustments are completed.
NOTICE: If it takes a long time to focus and correct astigmatism, you may end up with
specimen damage due to electron beam irradiation and/or contamination. If the
specimen is beam - or contamination - sensitive, we suggest the following techniques:
(a) Reduce probe current.
(b) Use another area on the specimen for focusing purposes. After focusing, return
to the area of interest, adjust the final focus quickly, and then capture or record
the image.
(2) Auto Focus Function
Click Auto
icon on the control panel or select the Auto Focus command from the
Operate menu to start Auto Focus.
When magnification is lower than 5,000×, coarse focus (search using a wide focus range) is
carried out. Fine focus (search using a narrow focus range) is carried out at magnifications
higher than 5,000×.
Fine focus works correctly under conditions where the image is not clear but visible.
The result of Auto Focus depends on the surface structures of the specimen. When there is
