7-6 Preliminary May 9, 2000 APX 8000/MAX TNT/DSLTNT Physical Interface Configuration Guide
Configuring T1 Cards
Making a profile the working profile
Making a profile the working profile
When the TAOS unit detects that a T1 card has been installed, it creates a default T1 profile for
each of the eight lines on the card.
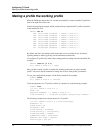
In the following display example, the Dir command shows eight default T1 profiles created for
a card installed in slot 2:
admin> dir t1
305 12/11/1996 15:58:20 { shelf-1 slot-2 2 }
305 12/11/1996 15:58:20 { shelf-1 slot-2 4 }
305 12/11/1996 15:58:20 { shelf-1 slot-2 5 }
305 12/11/1996 15:58:20 { shelf-1 slot-2 6 }
305 12/11/1996 15:58:20 { shelf-1 slot-2 7 }
305 12/11/1996 15:58:20 { shelf-1 slot-2 8 }
320 12/20/1996 20:55:31 { shelf-1 slot-2 3 }
317 01/08/1997 09:58:55 { shelf-1 slot-2 1 }
By default, the line is not enabled, which means that it is not available for use. Its default
signaling method is inband, typically used for channelized connections.
To configure a T1 profile, first make it the working profile by reading it into the edit buffer. For
example:
admin> read t1 {1 2 1}
T1/{ shelf-1 slot-2 1 } read
Once you have read in a profile, it remains the working profile until you read in another
profile. You can use the Set command to change one or more of the profile’s parameters.
To save your configuration changes, use the Write command. For example:
admin> write
T1/{ shelf-1 slot-2 1} written
To list the parameters in a T1 profile, use the List command, as in the following example:
admin> list
[in T1/{ shelf-1 slot-6 4 }]
name = ""
physical-address* = { shelf-1 slot-6 4 }
line-interface = { no d4 ami eligible low-priority inband +
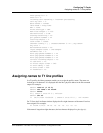
The following example shows the parameters in a T1 profile:
[in T1/{ shelf-1 slot-6 4 }:line-interface]
enabled = no
frame-type = d4
encoding = ami
clock-source = eligible
clock-priority = low-priority
signaling-mode = inband
robbed-bit-mode = wink-start
default-call-type = digital
switch-type = att-pri


