Configuring T3 Cards
Enabling a line
APX 8000/MAX TNT/DSLTNT Physical Interface Configuration Guide Preliminary May 9, 2000 11-5
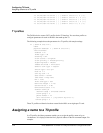
admin> read t3 {1 12 0}
admin> set name = T3 Trunk
admin> write
T3/{ shelf-1 slot-12 0 } written
admin> dir T3
17 04/17/1997 19:00:02 { shelf-1 slot-12 0 } "T3 Trunk"
For T3 lines, the Line Status window displays the first eight characters of the name if one has
been assigned. For example:
"T3 Trunk" 1/15/00 LA la la la la la la la
If the name is longer than eight characters, the last character displayed is a plus sign (+).
Enabling a line
By default each DS3 line is disabled. When the DS3 interface is disabled, it transmits the DS3
Idle Signal to the far end.
To enable a T3 line, read its profile to make it the working profile, then set the Line-Interface
subprofile’s Enabled parameter to Yes, as in the following example:
admin> read t3 {1 2 1}
T3/{ shelf-1 slot-2 1 } read
admin> set enabled = yes
admin> write
T3/{ shelf-1 slot-2 1 } written
Configuring the T3 physical link
You must specify a frame type and the length of the lines that connect the TAOS unit T3 slot
card to the DSX-3 cross-connect. The line length must reflect the longest line length you
expect to encounter in your installation. For a direct connection, double the value.
To configure the T3 card’s physical link, read its profile into the edit buffer, and enter the
following commands:
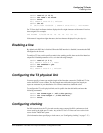
admin> set frame-type = [m13|c-bit-parity]
admin> set line-length = [0-225|226-450]
admin> write
Configuring clocking
For DS1 transmission, the T3 slot card uses the same system-wide PLL synchronous clock
source used by the eight-port T1 cards. Any of the T3 card’s T1 lines can serve as the clock
source for the TAOS unit system.
(For information about specifying a clock source, see “Configuring clocking” on page 7-17.)


