


Fortinet 124 FortiWeb 5.0 Patch 6 Administration Guide
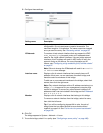
5. Configure these settings:
6. Click OK.
The bridge appears in System > Network > V-zone.
7. To use the bridge, select it in a policy (see “Configuring a server policy” on page 483).
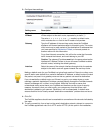
Setting name Description
Name Type a unique name that can be referenced in other parts of the
configuration. Do not use spaces or special characters. The
maximum length is 15 characters. The name cannot be changed
once you save the entry. See “Renaming entries” on page 58.
IP/Netmask To create a virtual network interface that can respond to ICMP
ECHO_REQUEST (ping) requests, enter an IP address/subnet
mask for the virtual network interface. Like non-bridge network
interfaces, this IP address will result in ARP traffic to notify the
network during an HA failover. For more information on HA
failover, see “Configuring a high availability (HA) FortiWeb cluster”
on page 97.
Note: Failure to change the IP/Netmask will result in an Invalid
IP Address error message.
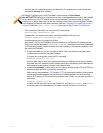
Interface name Displays a list of network interfaces that currently have no IP
address of their own, nor are members of another bridge, and
therefore could be members of this bridge.
To add one or more network interfaces to the bridge, select their
names, then click the right arrow.
Note: Only network interfaces with no IP address can belong to a
bridge. port1 is reserved for your management computer, and
cannot be bridged. To remove any other network interface’s IP
address so that it can be included in the bridge, set its IP/Netmask
to 0.0.0.0/0.0.0.0.
Member Displays a list of network interfaces that belong to this bridge.
To remove a network interface from the bridge, select its name,
then click the left arrow.
Tip: If you will be configuring bypass/fail-to-wire, the pair of
bridge ports that you select should be ones that are wired
together to support it. See “Fail-to-wire for power loss/reboots”
on page 520.