


3G Storm Series
®
Wheelchairs 96 Part No. 1104849
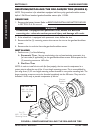
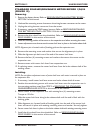
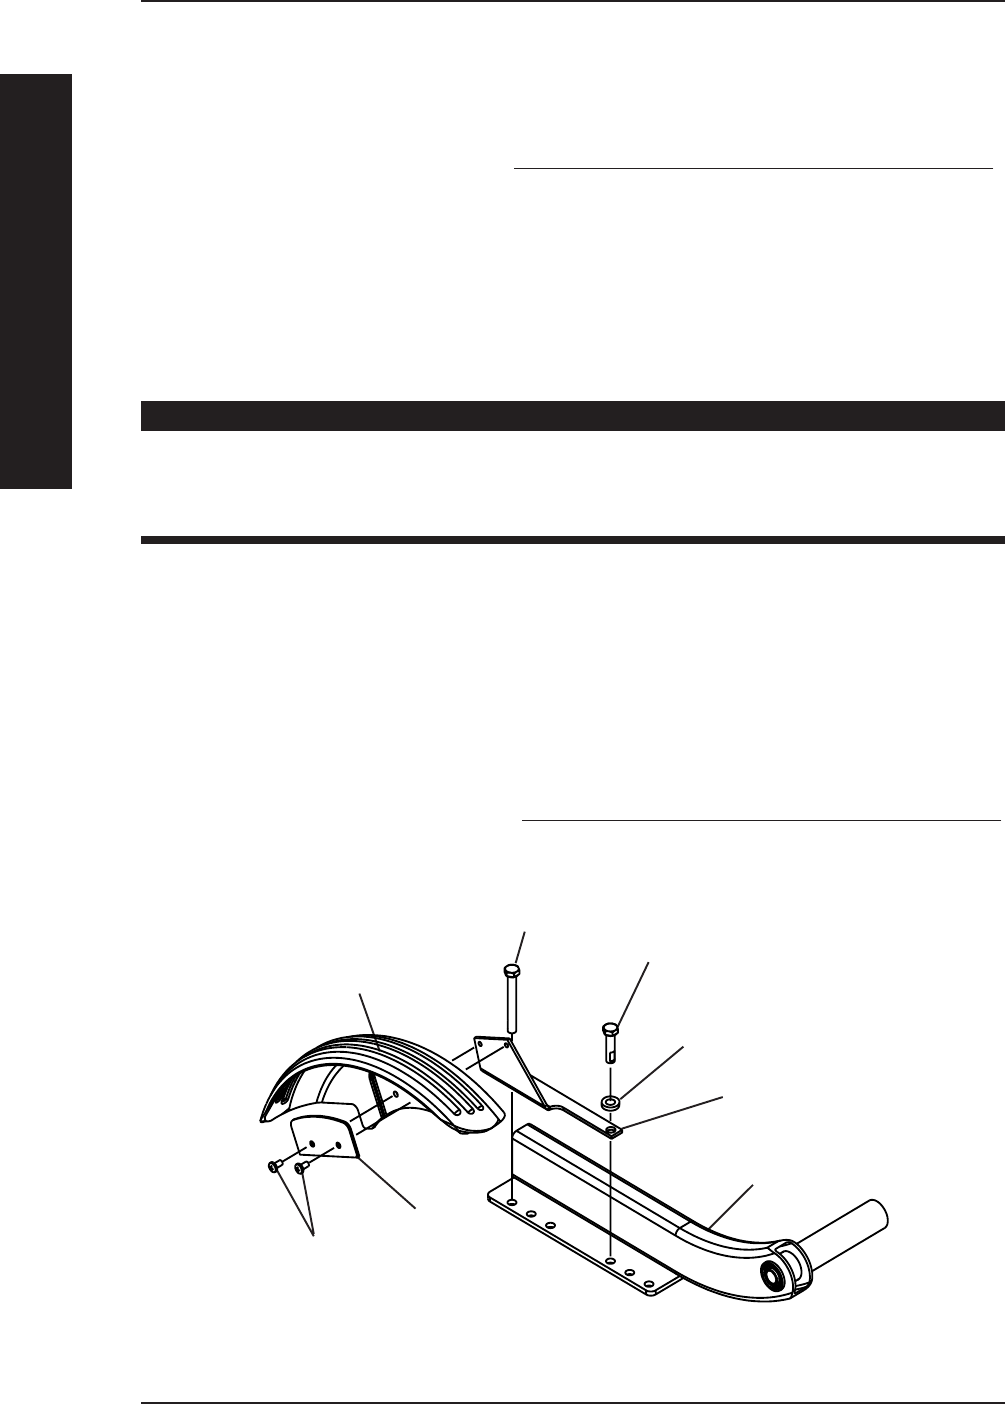
INSTALLING/REMOVING FENDERS
4 POLE MOTORS (FIGURE 12)
Installing.
1. Remove the drive wheel. Refer to REMOVING/INSTALLING THE DRIVE WHEELS
in this section of the manual.
NOTE: When performing STEPS 2 and 3, only the two (2) mounting screws on the side of the
suspension arm where the drive wheel mounts need to be removed in order to install the fender.
2. Remove the LONGER mounting screw that secures the rear of motor/gearbox to
the suspension arm.
3. Remove the SHORTER mounting screw and lock washer (if applicable) that secures
the rear of motor/gearbox to the suspension arm.
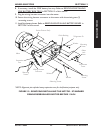
CAUTION
The longer mounting screws MUST be used to secure the REAR of the
gearbox to the suspension arm and the SHORTER mounting screws
MUST be used to secure the FRONT of the gearbox to the suspension
arm - otherwise, damage to the gearbox casting can result.
4. Secure the rear of 4 pole fender bracket to the suspension arm and motor/gearbox,
in the orientation shown, using the LONGER mounting screw removed in STEP 2.
Torque mounting screw to 160 in-lbs.
5. Secure the front of 4 pole fender bracket to the suspension arm and motor/gearbox,
in the orientation shown, using the SHORTER mounting screw and lock washer (if
applicable) removed in STEP 3. Torque mounting screw to 160 in-lbs.
6. Secure the fender and spacer to the 4 pole fender bracket, in the orientation shown,
with two (2) pan head tap screws provided. Securely tighten.
7. Reinstall the drive wheel. Refer to REMOVING/INSTALLING THE DRIVE WHEELS
in this section of the manual.
SECTION 12 WHEELS/MOTORS
WHEELS/MOTORS
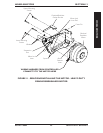
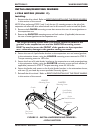
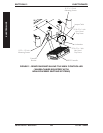
LONGER
Mounting Screw
Suspension
Arm
FIGURE 12 - INSTALLING/REMOVING FENDERS -
4 POLE MOTORS
4 pole
Fender Bracket
Fender
Spacer
Pan Head
Tap Screws
SHORTER
Mounting Screw
Lock Washer
(if applicable)