


3G Storm Series
®
Wheelchairs 46 Part No. 1104849
SECTION 7 BASE FRAME
BASE FRAME
This Section Includes the Following:
Replacing Seat Mounting Plates
Replacing Seat Support Brackets
Replacing Seat Support Bracket T-Nuts
Replacing Battery Charger Bracket and T-Nut
Removing/Installing Seat Stop Screws
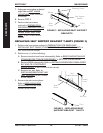
REPLACING SEAT MOUNTING PLATES (FIGURE 1)
NOTE: When replacing components of the wheelchair, refer to the individual procedure for
correct use of LOCTITE 242 and torque specifications or SECTION 3 of this Manual.
1. Perform the instructions outlined in
PREPARATION FOR REMOVING/INSTALLING
SEAT FRAME (STANDARD FRAME, ADJUSTABLE FRAME, AND VAN SEAT) in
SECTION 6 of this manual.
2. Perform one (1) of the following:
A. Remove standard seat frame subassembly. Refer to REMOVING/INSTALLING
STANDARD SEAT FRAME SUBASSEMBLY in SECTION 6 of this manual.
B. Remove ASBA subassembly. Refer to INSTALLING/REMOVING ASBA ASSEMBLY
AND OR COMPONENT REPLACEMENT in SECTION 6 of this manual.
C. Remove van seat. Refer to INSTALLING/REMOVING VAN SEAT ASSEMBLY in
SECTION 6 of this manual.
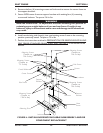
NOTE: Before removing seat mounting plates, note the position of the washers.
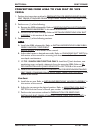
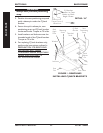
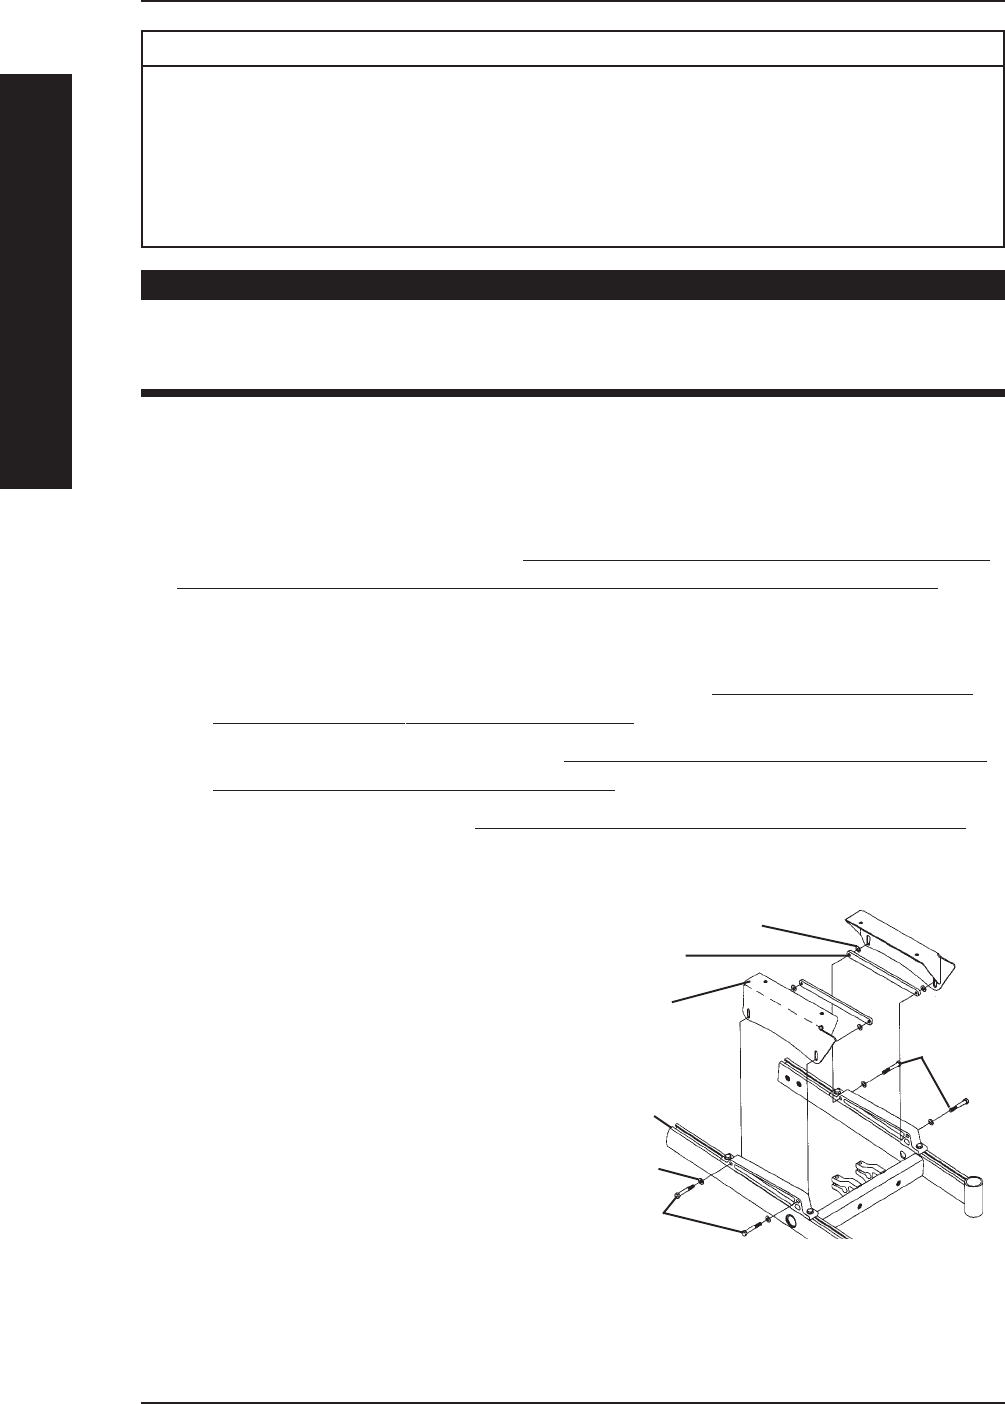
3. Remove the two (2) mounting screws,
washers and bolt strap bracket that
secure the seat mounting plate to the
seat support bracket.
4. Secure NEW seat mounting plate with
existing two (2) mounting screws,
washers, and bolt straps to seat
support bracket using Loctite 242 and
torque to 156 in-lbs.
WARNING
After ANY adjustments, repair or service and BEFORE use, make sure that
all attaching hardware is tightened securely - otherwise injury or damage
may result.
Washer
Washer
Mounting
Screws
Seat
Mounting
Plate
Bolt Strap
FIGURE 1 - REPLACING SEAT
MOUNTING PLATES
Seat
Support
Bracket
Mounting
Screws