


3G Storm Series
®
Wheelchairs 44 Part No. 1104849
SECTION 6 SEAT FRAME
SEAT FRAME
INSTALLING
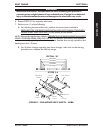
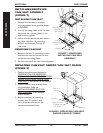
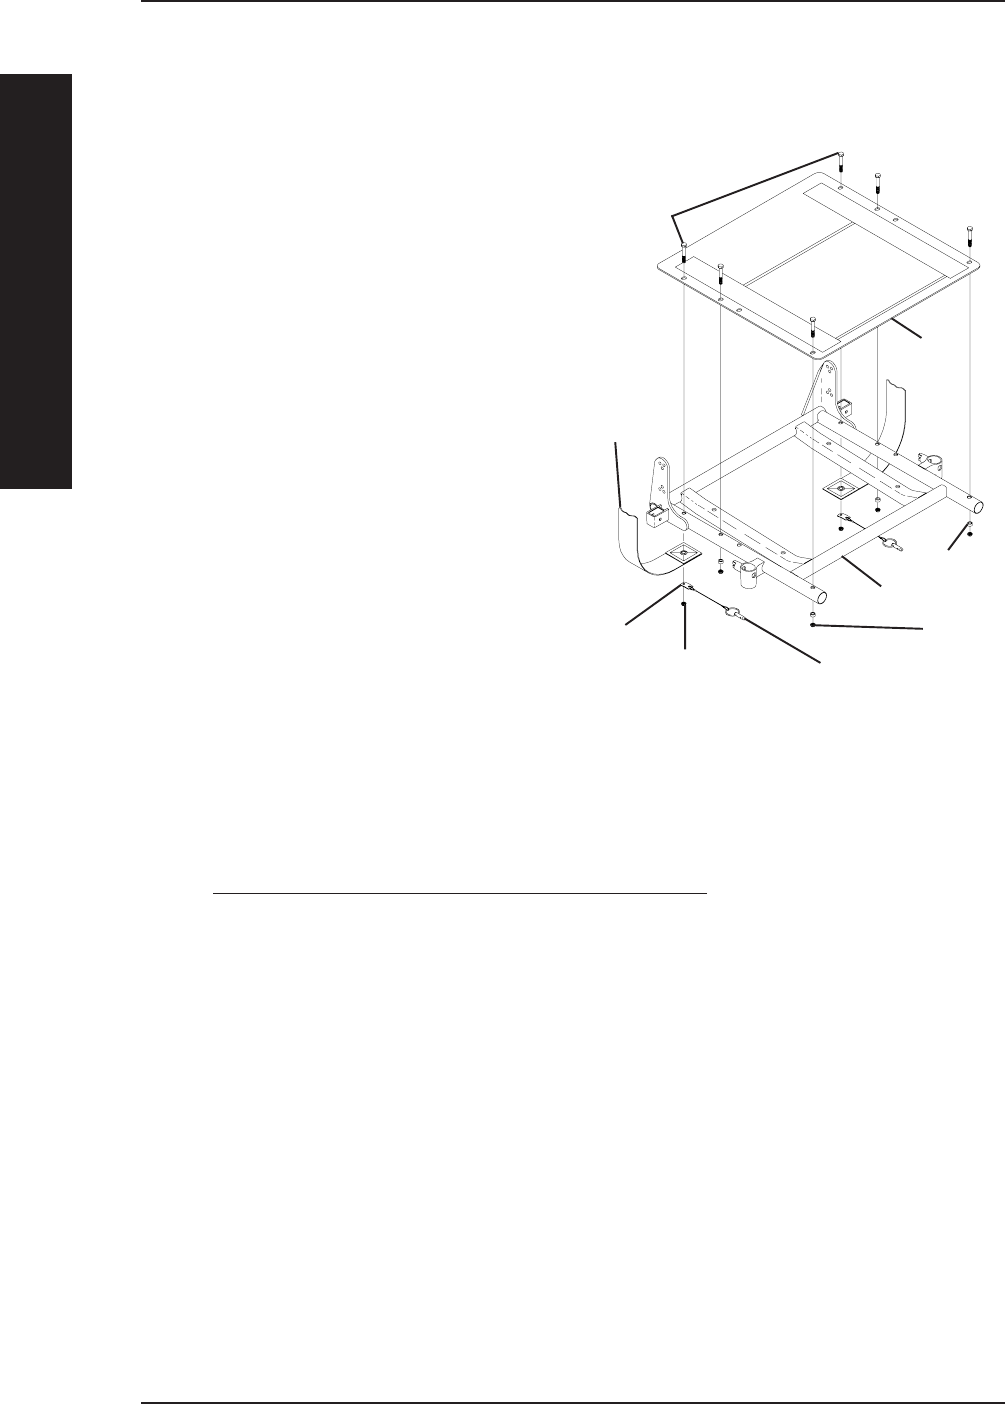
1. Position the NEW seat pan on the seat frame, aligning the mounting holes of the
seat pan and the mounting holes of the seat frame.
2. Position the seat positioning strap and
quick release pin tab onto the seat
frame and secure with mounting screw
and locknut. See FIGURE 9 for proper
orientation. Repeat for other seat
positioning strap.
NOTE: Check seat positioning strap for proper
length. The width range for the four (4) seat
positioning straps are: 12 to 16-inches wide
(Junior), 16 to 19-inches wide, 20 to 22-inches
wide, and 23 to 24-inches wide.
3. Reinstall the remaining mounting
screws, locknuts, and spacers. Torque
all mounting screws to 75 in-lbs.
4. Remove the protective strips from new
seat pan and reinstall the seat cushion
onto the seat pan.
5. Perform one (1) of the following:
A. When changing the seat width or
depth, refer back to that procedure
to complete the desired change.
B. Reinstall the flip-back armrests
from the wheelchair. Refer to
INSTALLING/REMOVING FLIP BACK ARMRESTS in SECTION 4 of the
Owner’s Manual, part number 1104782 or 1123757.
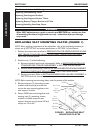
FIGURE 9 - REMOVING/
INSTALLING SEAT PAN
Seat
Pan
Seat Frame
Seat
Positioning
Strap
Locknut
Quick Release Pin
NOTE: Illustration shows standard frame only
for clarity. The seat pan removes/installs onto
the ASBA the way.
Mounting
Screws
Tab
Locknut
Spacer