


Part No. 1104849 135 3G Storm Series
®
Wheelchairs
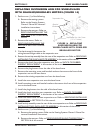
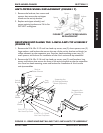
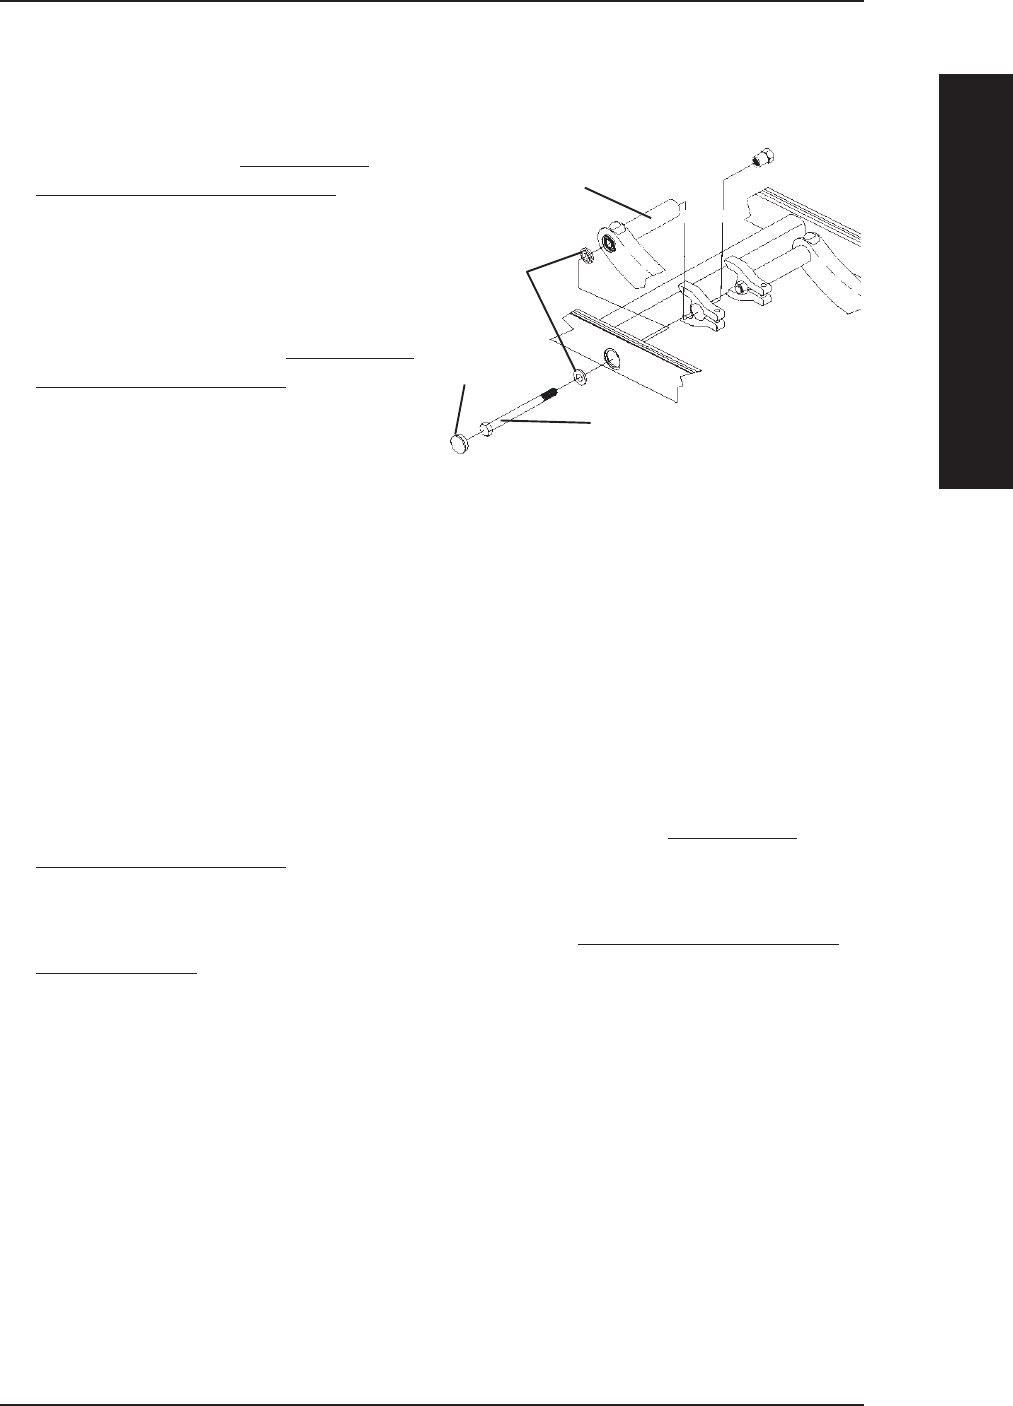
REPLACING SUSPENSION ARM FOR WHEELCHAIRS
WITH MOTOR/GEARBOX ASSEMBLY (FIGURE 15)
1. Remove the drive wheels from the
wheelchair. Refer to
REMOVING/
INSTALLING DRIVE WHEELS in
SECTION 12 of this manual.
2. Loosen the hex screws that secure
wiring harness to sub-frame assembly.
3. Remove gearbox from the existing
suspension arm. Refer to
REMOVING/
INSTALLING GEARBOX in this
section of the manual.
4. Remove plug buttons from the middle
of the base frame.
5. Remove the hex screws and the bev-
eled washers that secure the suspension
arm assembly to the base frame.
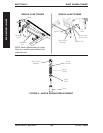
6. Remove existing suspension arm from the wheelchair.
NOTE: When installing the NEW suspension arm, the beveled washers MUST be placed on
the inside and outside of the base frame, with the bevels facing each other.
7. Install the NEW suspension arm assembly onto the base frame.
8. Torque suspension arm hex screws (1/2 x 7-inches) to 85 ft-lbs (approximately
1,020 in-lbs) and replace plug buttons.
9. Reinstall the gearbox onto the existing suspension arm. Refer to REMOVING/
INSTALLING GEARBOX in this section of the manual.
10. Tighten the hex screws that secure wiring harness to sub-frame assembly securely.
11. Reinstall the drive wheel onto the wheelchair. Refer to REMOVING/INSTALLING
DRIVE WHEELS in SECTION 12 of this manual.
12. Repeat STEPS 1-11 for the opposite side of the wheelchair, if necessary.
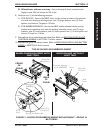
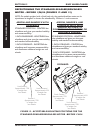
Suspension Arm Hex Screw
(1/2 x 7-inches)
FIGURE 15 - REPLACING
SUSPENSION ARM FOR
WHEELCHAIRS WITH MOTOR/
GEARBOX ASSEMBLY
Suspension Arm
Plug
Button
Beveled
Washers
RWD WHEELCHAIRS SECTION 15
RWD WHEELCHAIRS