39
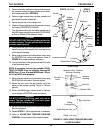
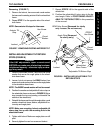
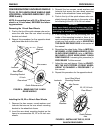
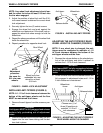
FIGURE 4 - REMOVING THE 12-INCH
REAR WHEELS
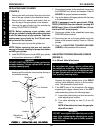
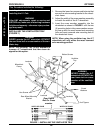
Installing the 20, 22 or 24-inch Rear Wheels
1. Remove the hex screws, coved washers and
locknuts that secure the rear wheel mounting
bracket to the wheelchair frame.
2. Invert the rear wheel mounting bracket on the
frame to accommodate 20, 22 or 24-inch rear
wheels.
Coved
Washers
20, 22, 24-inch
Rear Wheel
Locknuts
Invert Rear Wheel
Mounting Bracket
Hex Screws
Quick-Release
Axle
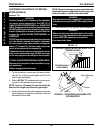
FIGURE 5 - INSTALLING THE 20, 22 OR
24-INCH REAR WHEEL
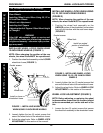
Coved
Washers
Hex screws
Rear Wheel
Mounting Bracket
Quick-Release axle
Locknuts
12-inch
Rear wheel
CONVERSION FROM 12-INCH REAR WHEELS
TO 20, 22 OR 24-INCH REAR WHEELS AND
VICE/VERSA - NON-RECLINERS ONLY (FIG-
URES 4 and 5)
NOTE: If converting from a 20, 22 or 24-inch rear
wheel to a 12-inch wheel, REVERSE the follow-
ing procedures.
Removing the 12-inch Rear Wheels
1. Push-in the tip of the quick-release axle and re-
move the axle from the rear wheel mounting
bracket and wheel.
2. Repeat this procedure for the opposite wheel
and place them both to the side.
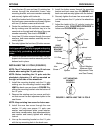
3. Reinstall the hex screws, coved washers and
locknuts that secure the rear wheel mounting
bracket to the wheelchair frame and tighten.
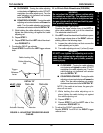
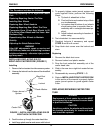
4. Push-in the tip of the quick-release axle com-
pletely through the opening in the center of the
axle bushing of the 20, 22 or 24-inch wheel.
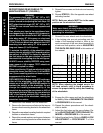
WARNING
Make sure detent pin and locking pins of the
quick-release axles are fully released BEFORE
operating the wheelchair.
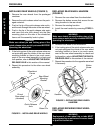
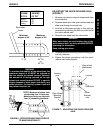
5. If the locking pins are not protruding past the
inside of the mounting bracket or there is too
much movement of the rear wheel assembly in
a back and forth position, refer to ADJUSTING
THE QUICK-RELEASE AXLE in this section of
the manual.
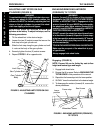
6. Reposition the wheel locks. Refer to INSTALL-
ING WHEEL LOCKS WHEN USING 20, 22 OR
24-INCH REAR WHEELS (refer to INSTALL-
ING WHEEL LOCKS WHEN USING 12-INCH
REAR WHEELS if reversing this procedure) in
PROCEDURE 7 of this manual.
7. Adjust the rear anti-tippers. Refer to ADJUST-
ING THE ANTI-TIPPERS IF REAR WHEEL
HEIGHT IS CHANGED in PROCEDURE 7 of
this manual.
8. Repeat this procedure for the opposite wheel.
W
H
E
E
L
S
PROCEDURE 6WHEELS


