


83
5. Using an Allen key, adjust the screw for hori-
zontal adjustment (68.3) until the pale stripe
of the filament image is in the centre of the
pupil.
6. Then adjust the screw for vertical adjustment
(68.2) to align the filament image vertically in
the centre of the pupil.
Method 3:
Centration in the plane of the specimen stage
1. Put a piece of paper or non-shiny piece of
Leica packaging on the specimen stage and
roughly focus the surface with a low-mag-
nification objective.
2. Set the field and aperture diaphragms at the
middle position.
3. Make a dot or cross on the centration area
with a felt or ball point pen and slide it into
the centre of the spot of light. Fix with the
specimen clip if necessary.
4. Screw out the objective or turn an empty
nosepiece position into the light path.
5. Using the centring screws, slide the image of
the filament into the middle of the centration
area marked with a dot or cross, as described
in Method 2.
Lamphousing 106 z L with halogen lamp,
Xe and Hg lamps
(switch gas discharge lamps on and off at sepa-
rate power units)
For lamphousing 106z the direct lamp image and
the reflection of the reflector are focused
separately and aligned to each other.
Either of the above methods can be used for
imaging the lamp filament or arc.
Centration of 12 V 100W halogen lamp
Move the reflection of the filament to the side or
entirely out of the light path by adjusting the
centring screws on the back of the lamphousing
(70.5, 71). Focus the direct image of the filament
with the collector adjustment (70.1)
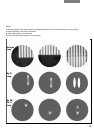
Then, using the centring buttons, adjust the
image of the filament until the centration area or
rear focal plane of the objective is half filled
(Fig. 71b).
Then focus the reflection of the filament with the
centring buttons for the reflector adjustment
and align symmetrically to the direct image
(Fig. 71c).
Risk of glare with gas discharge lamps! Use
neutral density filter (see p. 56).
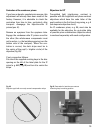
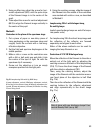
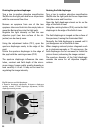
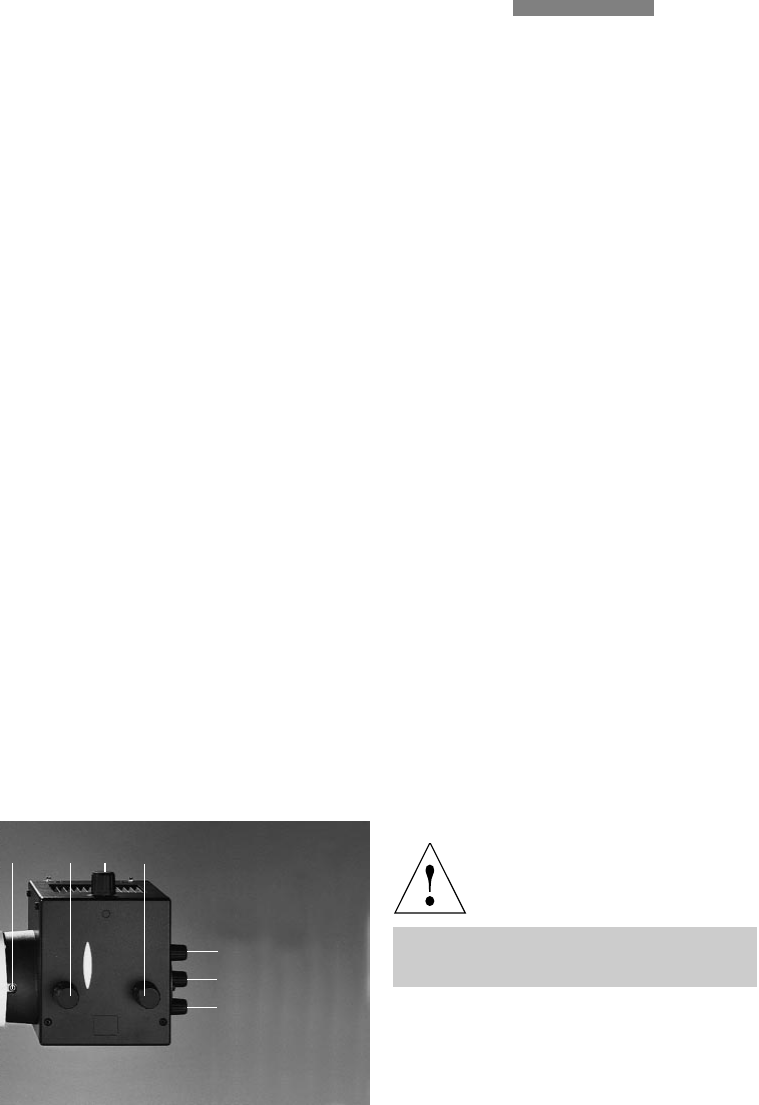
Fig.␣ 70␣ ␣ Lamphousing 106z with Hg 100 W lamp␣
1 Lamp adjustment, vertical, 2 Reflector adjustment, vertical,
3 Focusing of the reflector image, 4 Reflector adjustment, ho-
rizontal, 5 Lamp adjustment, horizontal, 6 Collector focusing,
7 Cover fixing screw
6
2
3
4
7
1
5