


109
● Switch off the microscope and the power unit.
● Disconnect the appliance cable of the micro-
scope and the power unit.
● Slacken the clamp screw on the microscope
and remove the lamphousing.
● Slacken the screws (88.4 and 88.9) on the lid
with a cross-tip screwdriver.
● Pull the cut-out plug slightly out of the socket
(88.11) and flip up lid.
n. b.:
Leave the protective cover on until the lamp
is inserted. Avoid making fingermarks, or
wipe off immediately.
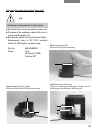
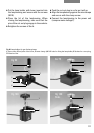
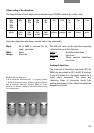
● Slacken the fixing screws (88.10) on the lamp
holder and pull out the lamp holder (Fig. 89).
● Remove the defect lamp.
● Put a new 12V/100W lamp into the lamp
holder.
● Push in the lamp holder and secure it with the
screws (88.10).
● Push the cut-out plug into the socket (88.11).
● Close the lid and tighten the screws (88.4 and
88.9) on the lid.
● Align the lamphousing against the microscope
and secure with the clamp screw.
● Connect the lamphousing to the power unit.
n. b.:
Leave the protective cover on until the lamp
is inserted. Avoid making fingermarks, or
wipe off immediately.
● Remove the defect lamp.
● Put a new 12 V 100 W halogen lamp into the
lamp holder without tilting (86.2 or 87.2).
● Move the collector back.
● Put on the lid and secure with screw (85.1 or
87.1).
● Align the lamphousing against the microscope
and secure with the clamp screw.
● Connect the lamphousing to the power unit.
Replacing the 12 V 100 W halogen lamp in
lamphousing 106 z*
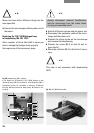
n. b.:
Always disconnect external transformers
and the microscope from the mains when
carrying out assembly work!