


25
2
1
3
3
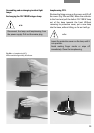
Assembling the ICT objective prisms
Assembling the IC module and IC objective
prisms
The IC prism disc with the IC prisms ordered by
the customer are already assembled in the
microscope at the factory. In case you want to
retrofit the IC prism disc, please proceed as
follows:
Remove the front cover (22.2) under the
objective nosepiece (23.1) after slackening the
Allen screws (22.4).
Insert the IC prism disc (22.1) in the mount and
tighten with the two Allen screws. n. b.: insert
the prism disc with the prism mount pointing
downwards.
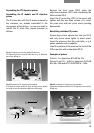
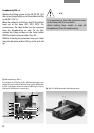
Retrofitting individual IC prisms:
Please align prisms against the stop pin (21.4)
and only screw down lightly to avoid strain.
Insert the prisms so that the code letter, e. g. A
points upwards and is readable.
Label the position of the prism on the front of the
ICR prism disc with a label plate (22.5).
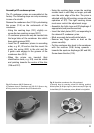
Examples of prisms:
Prism A – for objectives N PLAN 5x, 10x.
Prisms D and D1 – both for objectives N PLAN
20x, 50x, 100x and HC PL FLUOTAR 5x – 100x.
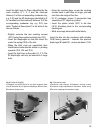
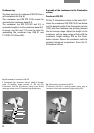
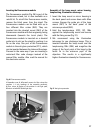
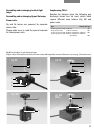
Fig. 21 IC objective prism disc without fixing knurl
1 IC objective prism in mount, 2 Code letter (e. g. A), 3 Washer
and screw, 4 Stop pin
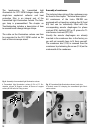
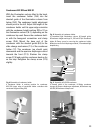
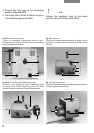
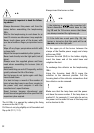
Fig. 22 Assembly of IC objective prism module
1 IC objective prism module, 2 Cover, 3 Fixing screw, 4 Hole
for fixing screws, 5 Label plates, 6 Knurled fixing knob
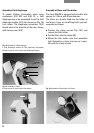
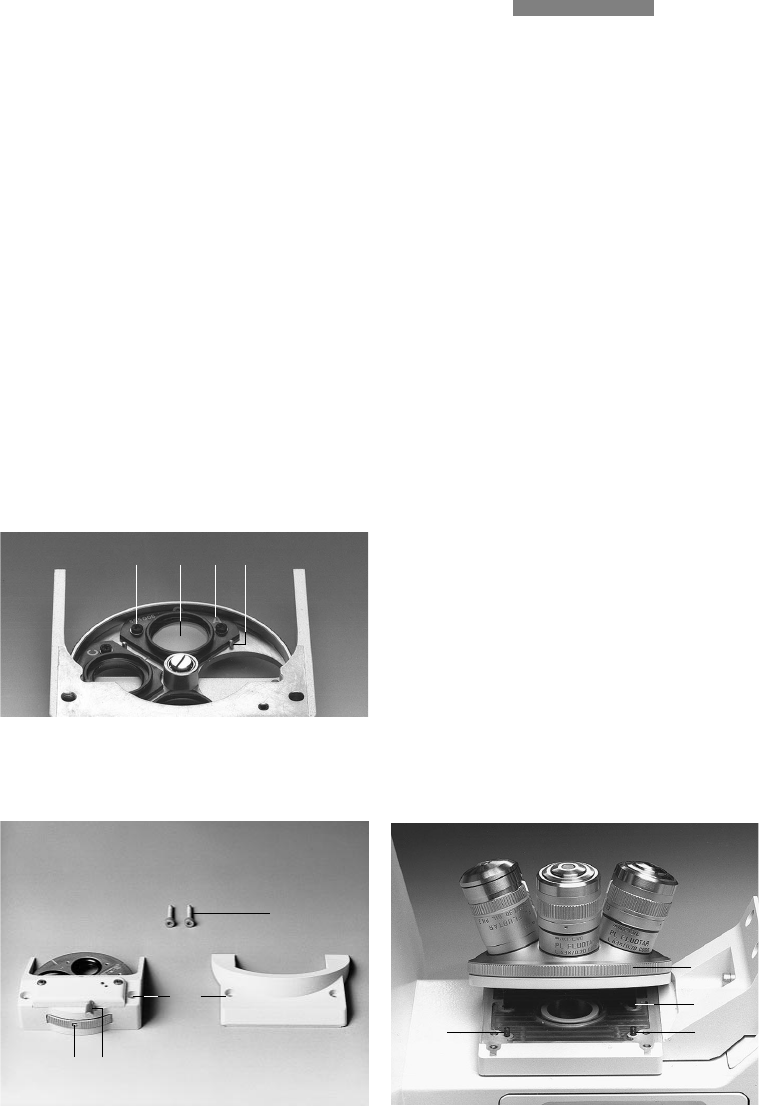
Abb. 23 Assembly of IC objective prism module
1 Objective nosepiece, 2 Mount for IC objective prism module,
3 Stop pins
1
3
2
4
3
4
5 6
2
1