106
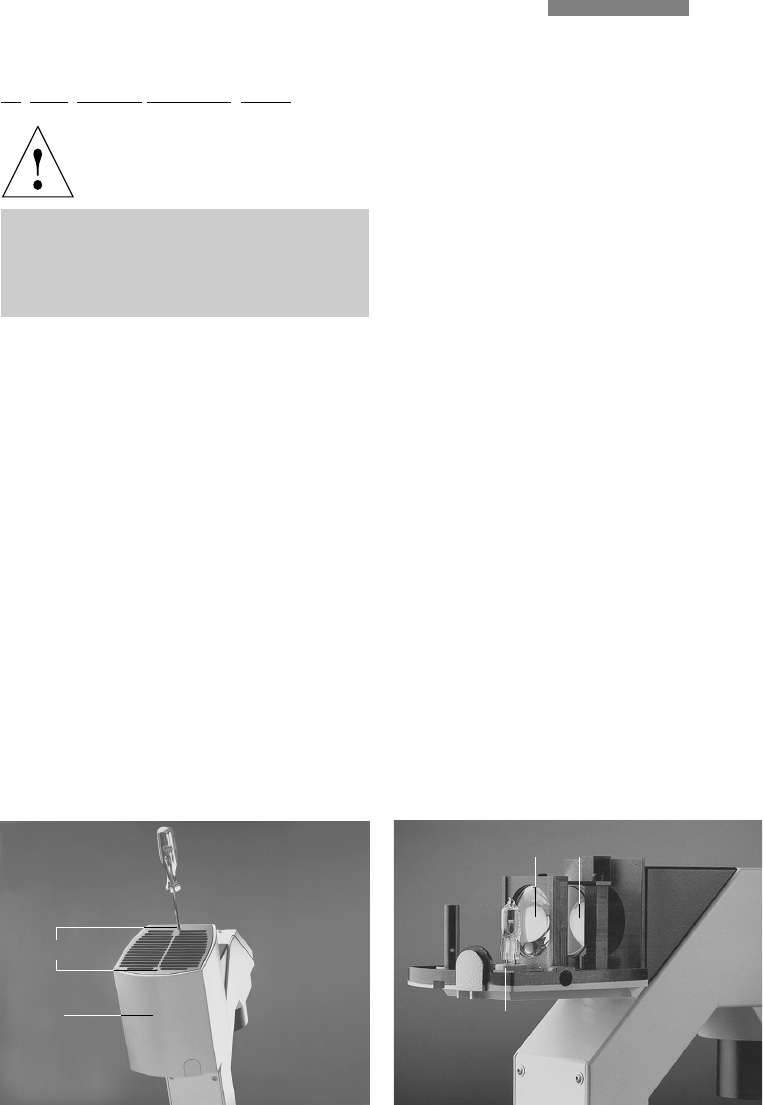
Replacing the 12 V/100 W halogen lamp
n. b.:
Remember to disconnect from the mains!
Leave the protective cover on until the lamp
is inserted. Avoid making fingermarks, or
wipe off immediately.
● Switch off the microscope and the power unit
(if used).
● Disconnect the appliance cable of the
microscope and the power unit.
● Disconnect the transmitted light illumination
column from the power supply on the back of
the microscope.
● Screw off the lamphousing with a 3 mm Allen
key.
● Remove the faulty lamp.
● Insert the new lamp as far as it will go into the
sockets of the lamp holder.
● Mount the lamphousing and screw down with
a 3 mm Allen key.
● Reconnect the transmitted light illumination
column to the power supply on the back of the
stand.
● Connect the microscope and, if used, the
power unit to the mains.
The additional fluorescence lamp does not
respond.
● Make sure the cable connections lamp – pow-
er unit – mains are correct and complete.
Possible causes for the failure of the
fluorescence lamp are: a defect fuse of the
power unit, a defect lamp or a defect burner in
the lamphousing.
Fig. 83 Lamphousing for transmitted light illumination
1 Cover, 2 Cover screws
Fig.␣ 84␣ ␣ Lamphousing for transmitted light illumination (cover
removed)
1 Lamp holder (pin base) with 12 V 100 W halogen lamp,
2 Collector, 3 Heat protection filter
1
2
1
2
3


