


Using Bookmarks
153
SonicWALL SSL VPN 5.5 User Guide
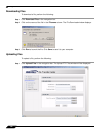
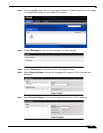
Step 2 Under Single Sign-On Settings, select Use SSL VPN account credentials to log into
bookmarks to enable SSO for bookmarks. Leave the box unchecked if you do not want to use
SSO for bookmarks.
Step 3 Click Save to save your changes.
Note Fileshares will use the configured domain name of which the user is a member to supply to
the backend server. HTTP, HTTPS, FTP, RDP - ActiveX, RDP- Java will supply the
username and password that was used to login. If the server is expecting a domain-prefixed
username, SSO will fail. In some cases, a default domain can be specified at the server to
allow SSO to succeed.
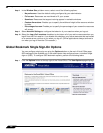
Per-Bookmark Single Sign-On Options
SonicWALL SSL VPN supports per-bookmark single sign-on for the following bookmark
services:
• Terminal Services (RDP - Active X)
• Terminal Services (RDP - Java)
• Web (HTTP)
• Secure Web (HTTPS)
• File Shares (CIFS)
• File Transfer Protocol (FTP)
Per-Bookmark SSO allows users to enable or disable SSO for individual bookmarks. This
flexibility in specifying login credentials is useful in the following cases:
• Users who use multiple accounts to access a variety of resources.
• Users who use two-factor authentication to log in to the SSL VPN Virtual Office, but use a
static password to access other resources.
• Users who need to access servers that require a domain prefix.
To configure per-bookmark SSO, perform the following tasks.
Step 1 Before enabling SSO on an individual bookmark, you must first enable SSO globally as
described in the “Global Bookmark Single Sign-On Options” section on page 152.
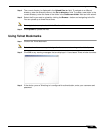
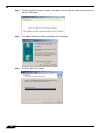
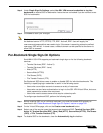
Step 2 On the Virtual Office page, click on the Create a new bookmark button.
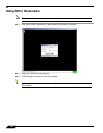
Step 3 Select one of the service types that supports per-bookmark SSO: Terminal Services (RDP -
Active X), Terminal Services (RDP - Java), Web (HTTP), Secure Web (HTTPS), File Shares
(CIFS), or File Transfer Protocol (FTP).
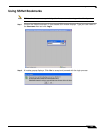
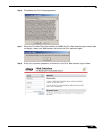
Step 4 To disable SSO for the bookmark, clear the Automatically log in checkbox.