


46
Reference Manual
00809-0100-4102, Rev AA
Section 3: Installation
May 2013
Installation
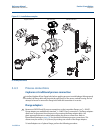
To make connections, perform the following procedure:
1. Remove the housing cover on the Power Module compartment side. The Power Module
supplies all power to the transmitter.
2. Connect Power Module 701PGNKF.
3. Replace the Power Module cover and tighten to safety specification (polymer to
polymer).
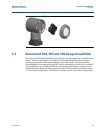
3.4.6 Installing the LCD display
Transmitters ordered with the LCD display will be shipped with the display installed.
Note
Only use Rosemount Wireless LCD Part Number: 00753-9004-0002
Note
An LCD from a wired device will not function in a wireless device.
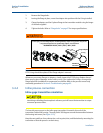
In addition to housing rotation, the optional LCD display can be rotated in 90-degree increments
by squeezing the two tabs, pulling out, rotating and snapping back into place.
If LCD pins are inadvertently removed from the interface board, carefully re-insert the pins
before snapping the LCD display back into place.
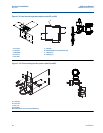
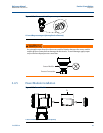
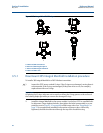
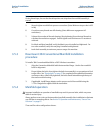
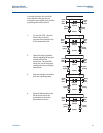
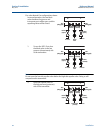
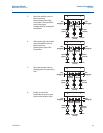
Use the following procedure and Figure 3-14 to install the LCD display:
1. Remove the back cover and Power Module.
2. Remove the transmitter cover opposite the field terminal side. Do not remove the
instrument covers in explosive environments when the circuit is live.
3. Engage the four-pin connector into the LCD display and snap into place.
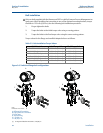
Note the following LCD temperature limits:
Operating:–40 to 175 °F (–40 to 80 °C)
Storage:–40 to 185 °F (–40 to 85 °C)