


SECTION 8—FRONT RIGGINGS/FOOTBOARD
Part No. 1125075 77 Pronto® Series
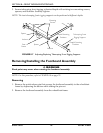
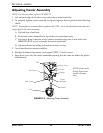
4. Using the two socket bolts, spacers and locknuts, secure the telescoping front rigging
support to the seat frame.
5. If necessary, repeat STEPS 2-4 on remaining telescoping front rigging support.
6. Reinstall the seat assembly. Refer to Removing/Installing the Seat Assembly on
page 50.
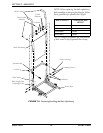
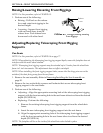
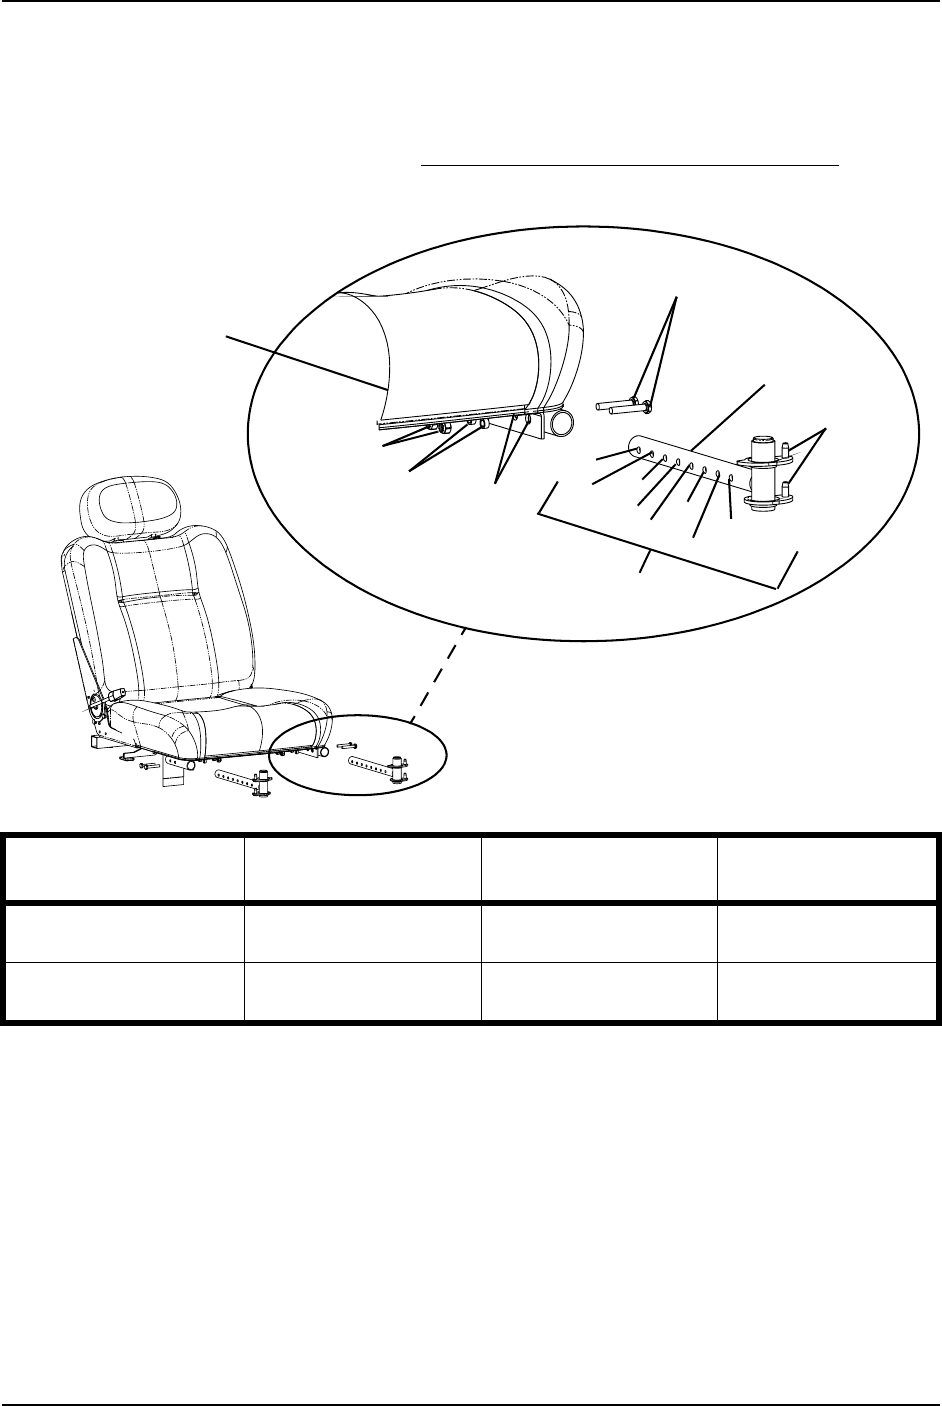
FIGURE 8.6 Adjusting/Replacing Telescoping Front Rigging Supports
ASBA Seat
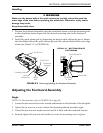
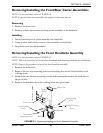
NOTE: For this procedure, refer to FIGURE 8.7 on page 78.
1. Remove the two mounting screws, spacers and locknuts that secure the telescoping
front rigging support to the seat frame.
2. Perform one of the following:
• Slide existing telescoping front rigging support to one of three depth positions.
• Remove existing telescoping front rigging.
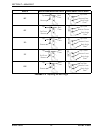
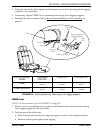
FRONT RIGGING
MODEL
STANDARD
POSITION
1 INCH OUT 2 INCHES OUT
PHW93
Holes
4 and 5
Holes
5 and 6
Holes
6 and 7
PH904A and PHAL4A
Holes
3 and 4
Holes
4 and 5
Holes
5 and 6
Spacers
Telescoping Front
Rigging Support
Mounting Holes
Locknuts
Mounting
Bolts
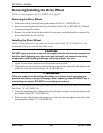
Seat
Inner
Mounting
Holes
2
Not Used
4
3
5
7
6
Hinge
Pins
8