


SECTION 25—SIEVE BED PRESSURE CHECK
Part No 1110538 97 Platinum™Series
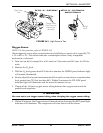
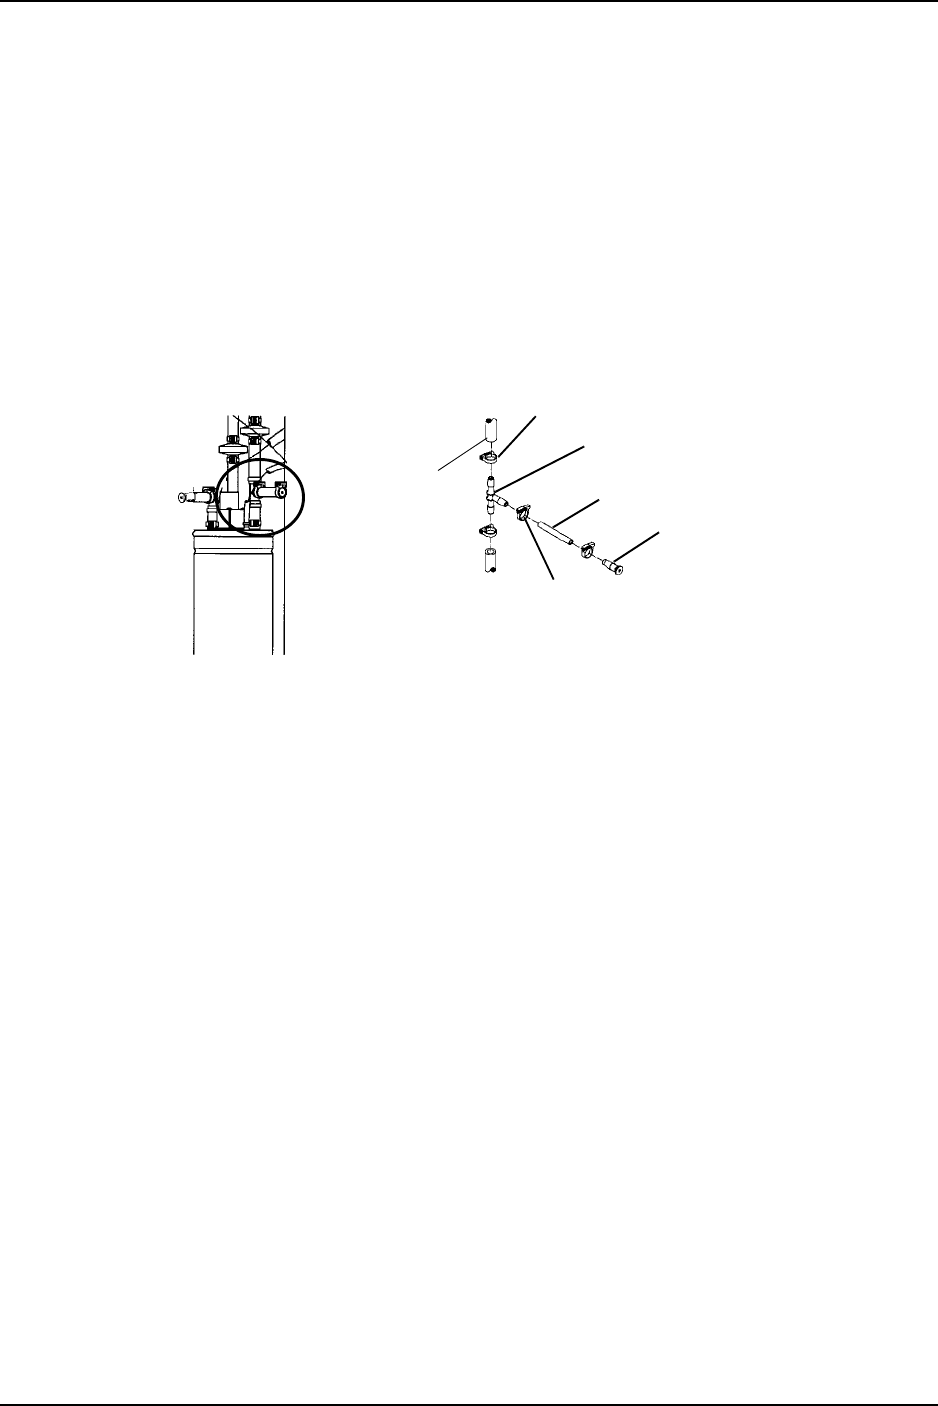
Installation
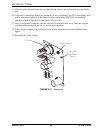
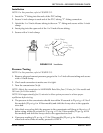
NOTE: For this procedure, refer to FIGURE 25.2.
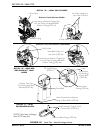
1. Insert the "T" fitting into the ends of the PVC tubing.
2. Secure ¼-inch clamps to each end of the PVC tubing “T” fitting connection.
3. Attach the ¼ x 2-inch silicone tubing to the new “T” fitting and secure with a ¼-inch
clamp.
4. Insert plug into the open end of the ¼ x 2-inch silicone tubing.
5. Secure with a ¼-inch clamp.
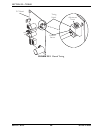
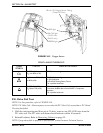
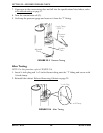
FIGURE 25.2 Installation
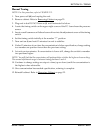
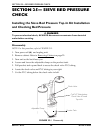
Pressure Testing
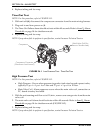
NOTE: For this procedure, refer to FIGURE 25.3.
1. Remove plug and connect pressure gauge to the ¼ x 2-inch silicone tubing and secure
with a ¼-inch clamp.
2. Check each connection to make sure it is tight.
3. Turn the concentrator On ( ) .
NOTE: Adjust the concentrator to MAXIMUM Rated liter flow (5 L/min. for 5 liter models and
10 L/min. for 10 liter models)
NOTE: Wait approximately five (5) minutes to allow system pressures to achieve proper
equilibrium before testing.
4. The pressure in the concentrator should rise within 20 seconds to 21 p.s.i.g. ± 0.3 for 5
liter models (25 p.s.i.g. for 10 liter models) and shift the 4-way valve to the opposite
sieve bed.
5. After the 4-way valve shift, the pressure in the concentrator will drop to 14 p.s.i.g. ± 2
before rising within 20 seconds to 21 p.s.i.g. ± 0.3 for 5 liter models (25 p.s.i.g. for 10
liter models) and shift the 4-way valve to the opposite sieve bed.
6. If pressure reading is 21 p.s.i.g. ± 0.3 for 5 liter models (25 p.s.i.g. for 10 liter models)
when both valve shifts are made, proceed to STEP 8.
¼-inch Clamp
“T” Fitting
¼ x 2-inch
Silicone Tubing
Plug
¼-inch Clamp
PVC
Tubing
I
/