SECTION 20—4-WAY VALVE
Part No 1110538 73 Platinum™Series
SECTION 20— 4-WAY VALVE
ƽ DANGER
To prevent electrical shock, ALWAYS disconnect concentrator from electrical out-
let before servicing.
Replacing 4-Way Valve
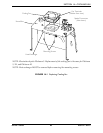
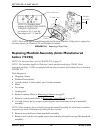
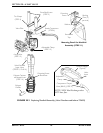
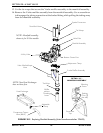
NOTE: For this procedure, refer to FIGURE 20.1 on page 74.
1. Unplug unit.
2. Remove cabinet. Refer to Removing Cabinet
on page 25.
3. Remove control panel. Refer to Removing Control Panel on page 62.
4. Remove the four mounting screws that secure the 4-way valve to the manifold
assembly.
5. Position new 4-way valve onto manifold assembly and loosely install mounting
screws through 4-way valve and into manifold assembly.
NOTE: Ensure the manifold gasket is in place on 4-way valve before installing.
CAUTION
Torque sequence and specification MUST be adhered to or possible damage to the
4-way valve could result.
6. Tighten mounting screws in the sequence described below.
7. Pre-torque the mounting screws to 10 ± 2 inch-lbs using the torque sequence.
8. The mounting screws can be now be torqued to 22 ± 2 inch-lbs in the same sequence.
CAUTION
This is a maintenance free valve. Opening the valve will void any and all warranties
applicable to the valve.


