Milestone XProtect Smart Client 3.0; User’s Manual
www.milestonesys.com Page 80 Day-to-Day Use
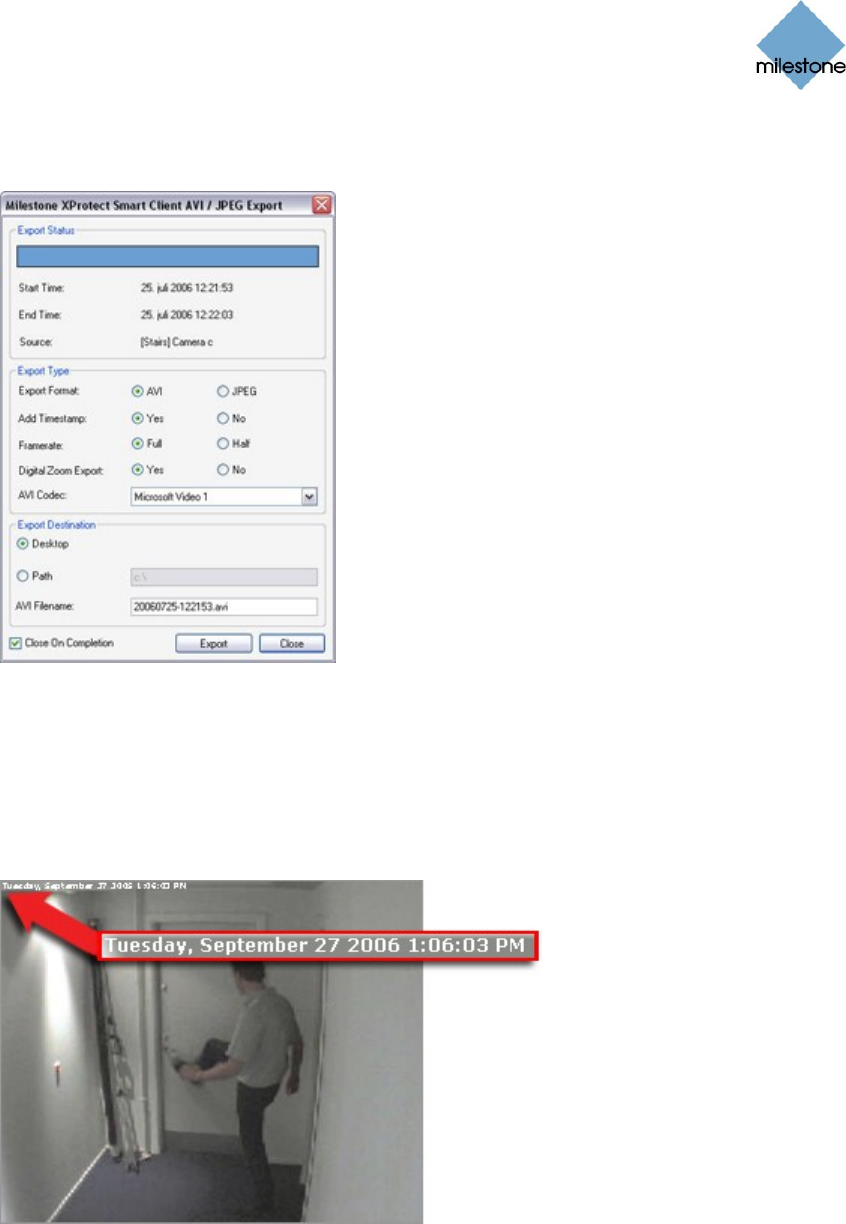
5. Click the AVI/JPEG Export... button. This will open a separate export dialog. The export
dialog will list the specified start time, end time, and camera:
6. In the export dialog’s Export Type section, select the required export format: AVI (movie
clip) or JPEG (still images).
7. Select whether to add timestamps from the surveillance system to the exported images.
If selected, small timestamps will appear in the corner of the images:
Example of timestamp; arrow indicates actual position.
Date and time format may be different on your computer.
8. This step applies for export in the AVI format only; if using the JPEG format, go to
step 9. Select required frame rate for the export. With the Full option, all images between
the start and end times will be included in the export; with the Half option, only every
second image will be included, yet still play back in real-time.


