Milestone XProtect Smart Client 3.0; User’s Manual
www.milestonesys.com Page 47 Further Configuration
1. Go to the Smart Client’s Setup tab.
2. From the Setup tab’s System Overview section, drag the HTML Page link to the required
position in the required view.
3. This will open the Open URL dialog, in which you specify the required HTML page.
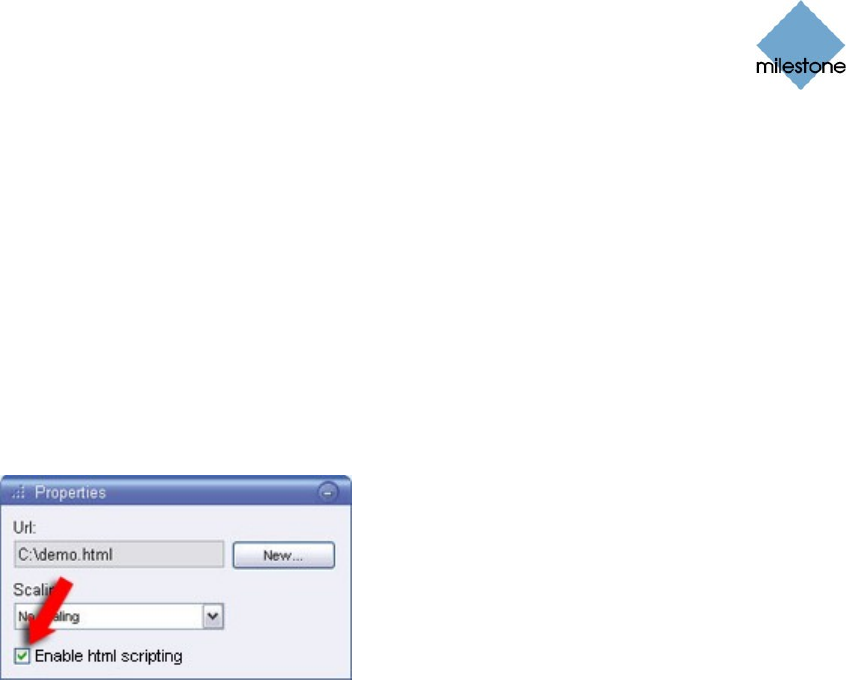
4. Having imported the HTML page, select its position in the view, and go to the Setup tab’s
Properties section.
5. In the Properties section, select Enable HTML Scripting:
Selecting Enable HTML Scripting ensures that the scripting required for your buttons or
other navigation features to work is automatically inserted in the HTML page.
6. Depending on the navigation features you have included on your HTML page, you may
often want to import the HTML page into several views in order for the navigation to fully
work.
System Administrator’s Check List
Milestone XProtect Enterprise system administrators wishing to create and distribute navigation
HTML pages to Smart Client users, do the following:
1. Create the required HTML page. The navigation controls in the HTML page must match the
views users see in their Smart Clients. For example, in order for a button leading to View1
to work, a view called View1 must exist in users’ Smart Clients.
If you intend to distribute the HTML page to a group of users, the views in which the HTML
page will be used should be placed in shared groups.
2. Save the HTML page locally on each computer on which it will be used. When saving the
HTML page locally, save it at a location to which an unambiguous path can be defined, for
example in a folder on the user’s C: drive (example: C:\myfolder\file.htm). Saving the
HTML page on the user’s desktop or in the user’s My Documents folder will not work
properly due to the way Windows constructs the path to such locations.
3. Import the HTML page into the Smart Client views in which it will be used.


