Instruction Manual
IB-106-340 Rev. 3.0
December 2003
9-16 Maintenance and Service Rosemount Analytical Inc. A Division of Emerson Process Management
Oxymitter 4000
11. Install the entire electronics per para-
graph 9-4c, steps 7 through 13.
12. Apply anti-seize compound to the
threads of the cell assembly, hub, and
setscrews. Reinstall the hub on the cell
assembly. Using pin spanner
wrenches, torque to 10 ft-lbs (14 N·m).
If applicable, reinstall the vee deflector,
orienting apex toward gas flow. Secure
with the setscrews and anti-seize com-
pound. Torque to 25 in-lbs (2.8 N·m).
13. On systems equipped with an abrasive
shield, install the dust seal gaskets,
with joints 180° apart.
14. Reinstall the probe and gasket on the
stack flange.
15. Follow the instructions in paragraph
9-4a.2 to install the Oxymitter 4000 into
the stack or duct. If installing an Oxy-
mitter 4000/SPS 4000 assembly, follow
the instructions in paragraph 9-4b.2. If
there is an abrasive shield in the stack,
make sure the dust seal gaskets are in
place as they enter the 15° reducing
cone.
16. Turn on power and monitor thermocou-
ple output. It should stabilize at
29.3+0.2 mV. Set reference air flow at
2 scfh (56.6 l/hr). After the Oxymitter
4000 stabilizes, calibrate the unit. If new
components have been installed, repeat
calibration after 24 hours of operation.
j. Ceramic Diffusion Element
Replacement
NOTE
This refers to the ceramic diffusion
element only.
1. General. The diffusion element pro-
tects the cell from particles in process
gases. Normally, it does not need to be
replaced because the vee deflector
protects it from particulate erosion.
In severe environments, the filter may
be broken or subject to excessive ero-
sion. Examine the ceramic diffusion
element whenever removing the probe
for any purpose. Replace if damaged.
Damage to the ceramic diffusion ele-
ment may become apparent during
calibration. Compare probe response
with previous response. A broken diffu-
sion element will cause a slower re-
sponse to calibration gas. Hex
wrenches needed to remove setscrews
and socket head screws in the follow-
ing procedure are available as part of a
Probe Disassembly Kit, Table 11-1.
2. Replacement Procedure.
(a) Follow the instructions in para-
graph 0 to remove the Oxymitter
4000 from the stack or duct.
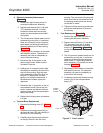
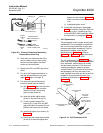
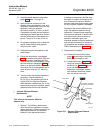
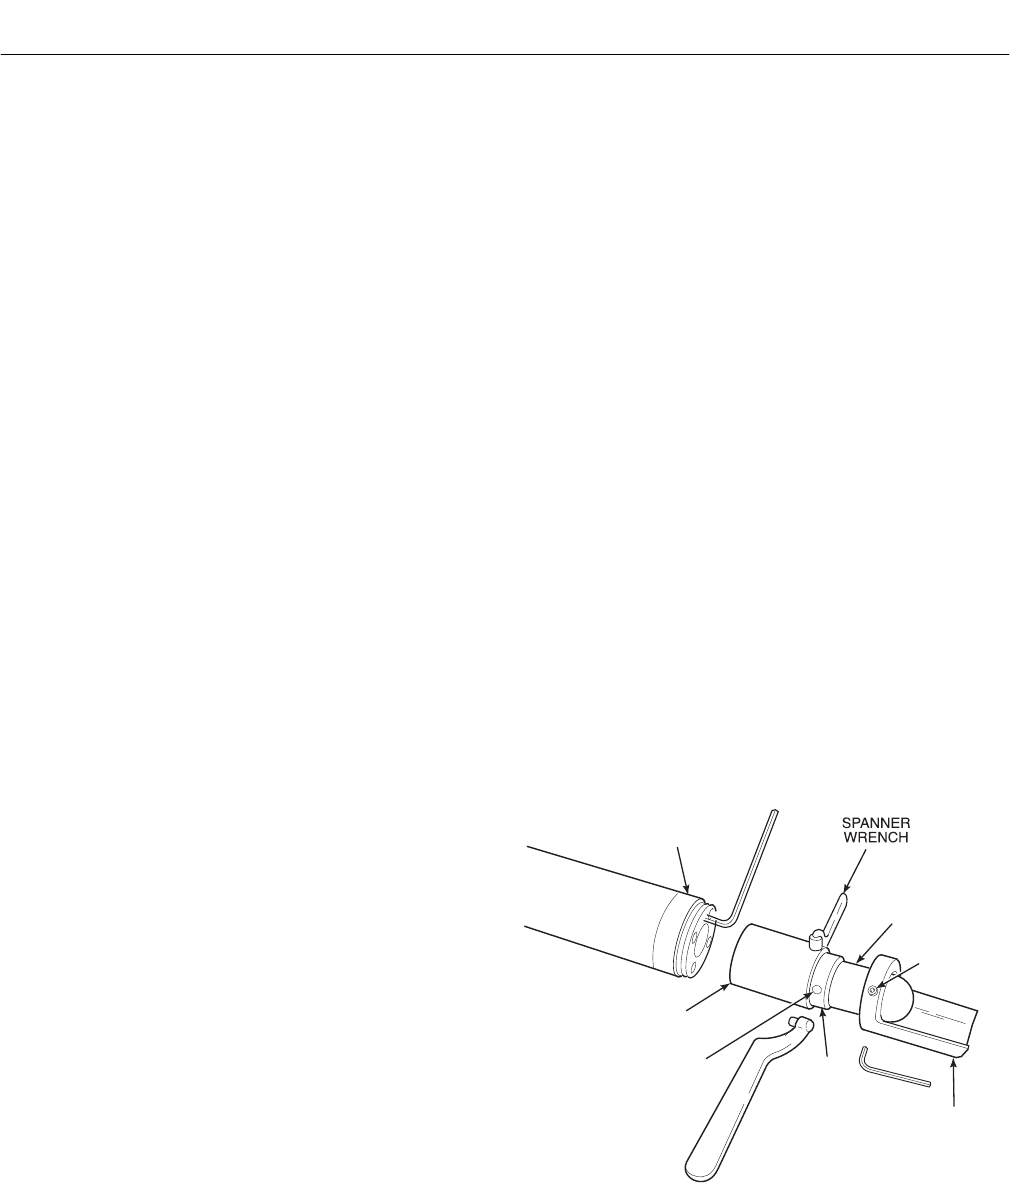
(b) Loosen setscrews, Figure 9-11,
using hex wrench from Probe Dis-
assembly Kit, Table 11-1, and re-
move vee deflector. Inspect
setscrews. If damaged, replace
with stainless setscrews coated
with anti-seize compound.
OPTIONAL CERAMIC
DIFFUSION ELEMENT
VEE
DEFLECTOR
HUB
SETSCREW
RETAINER
CEMENT
PORT
CEMENT
FILLET
22220029
Figure 9-11. Ceramic Diffusion Element
Replacement


