


SECTION 6—ARMS
At’m and At’m QT 38 Part No. 1125078
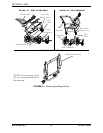
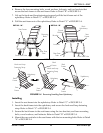
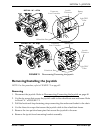
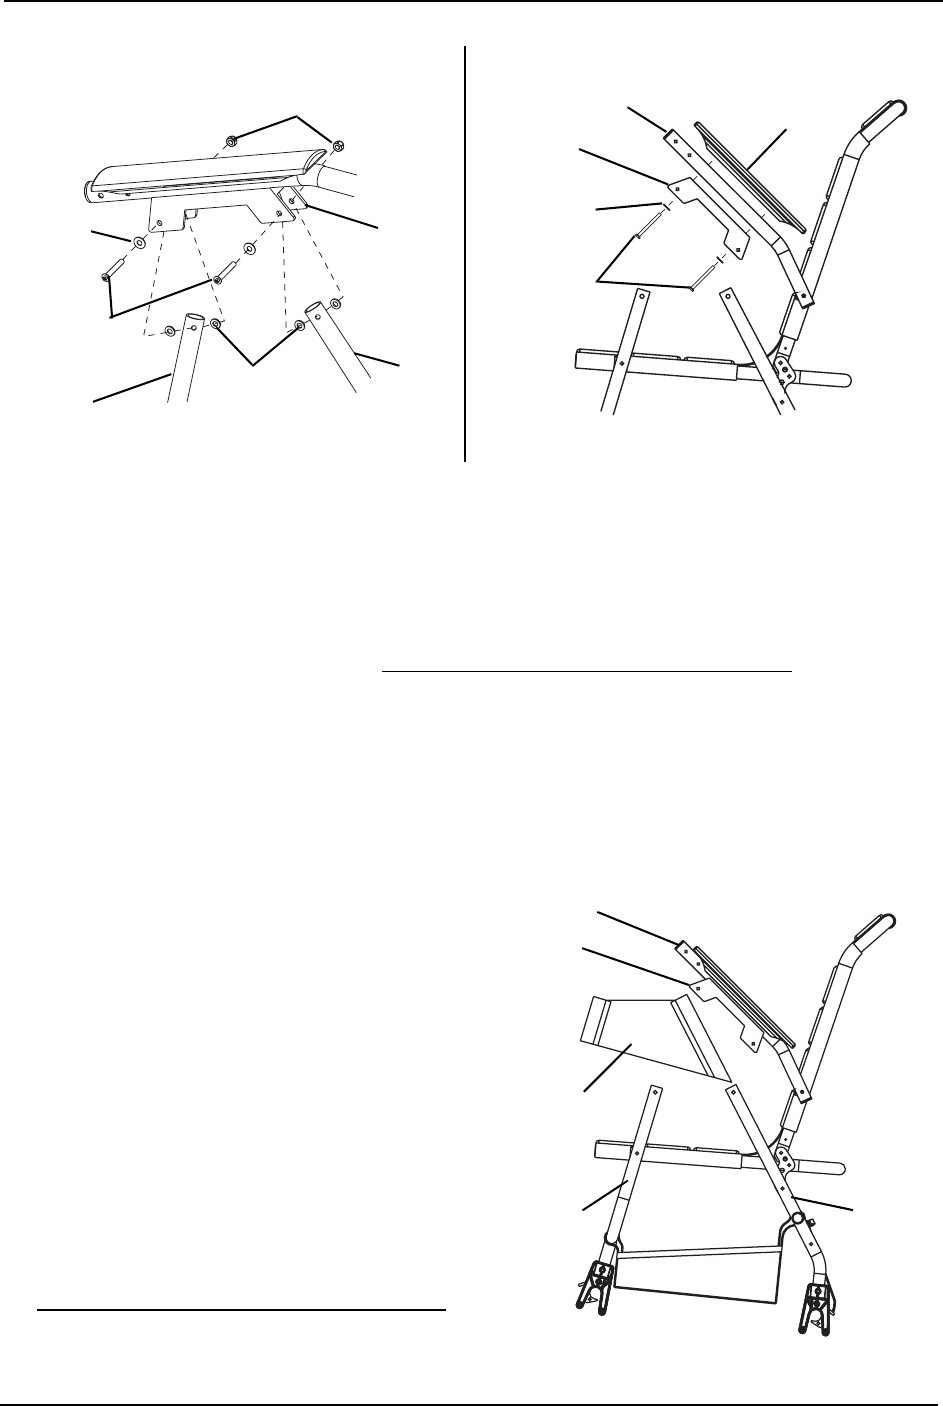
FIGURE 6.1 Removing/Installing Arm Pads
Replacing Clothing Guard
NOTE: For this procedure, refer to FIGURE 6.1 and FIGURE 6.2.
1. Disconnect the joystick. Refer to Disconnecting/Connecting the Joystick on page 40.
2. Remove the two mounting bolts, four nylon washers, two locknuts and steel washers
that secure the arm bracket to the front and rear seat tubes (Detail “A” of FIGURE 6.1).
3. Lift up arm tube.
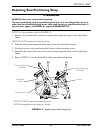
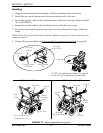
4. Slide the clothing guard off the front and rear seat tubes (FIGURE 6.2).
5. Slide the new clothing guard onto the front and back seat tubes.
NOTE: The mesh side of the clothing guard
should face out.
6. Lower the arm tube.
7. Align the mounting holes in the arm
bracket with those in the front and rear
seat tubes.
8. Secure the arm bracket to front and
back seat tubes with the two mounting
bolts, four nylon washers, two locknuts
and steel washers (FIGURE 6.1).
9. Repeat STEPS 2 to 8 for the other side.
10. Connect the joystick. Refer to
Disconnecting/Connecting the Joystick
on page 40.
FIGURE 6.2 Replacing Clothing Guard
Arm
Pad
Arm Tube
Arm
Bracket
Washers
Mounting
Screw
Washers
Front Seat
Tube
Rear
Seat
Tube
Nylon
Washers
Locknuts
Mounting
Bolts
NOTE: Clothing guard not shown for clarity.
DETAIL “A”
DETAIL “B”
Arm
Bracket
Arm Tube
Clothing
Guard
Front Seat
Tube
Rear Sea
t
Tube
Arm
Bracket