


4. INSTALLATION
4-3
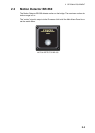
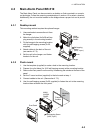
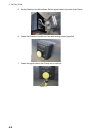
4.3 Main Alarm Panel BR-510
The Main Alarm Panel can be mounted on a desktop or flush mounted in a console,
on the bridge. Follow the mounting considerations in section 4.2 to select a location.
Additionally, the unit must be located on the bridge where a proper look out is provid-
ed.
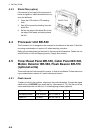
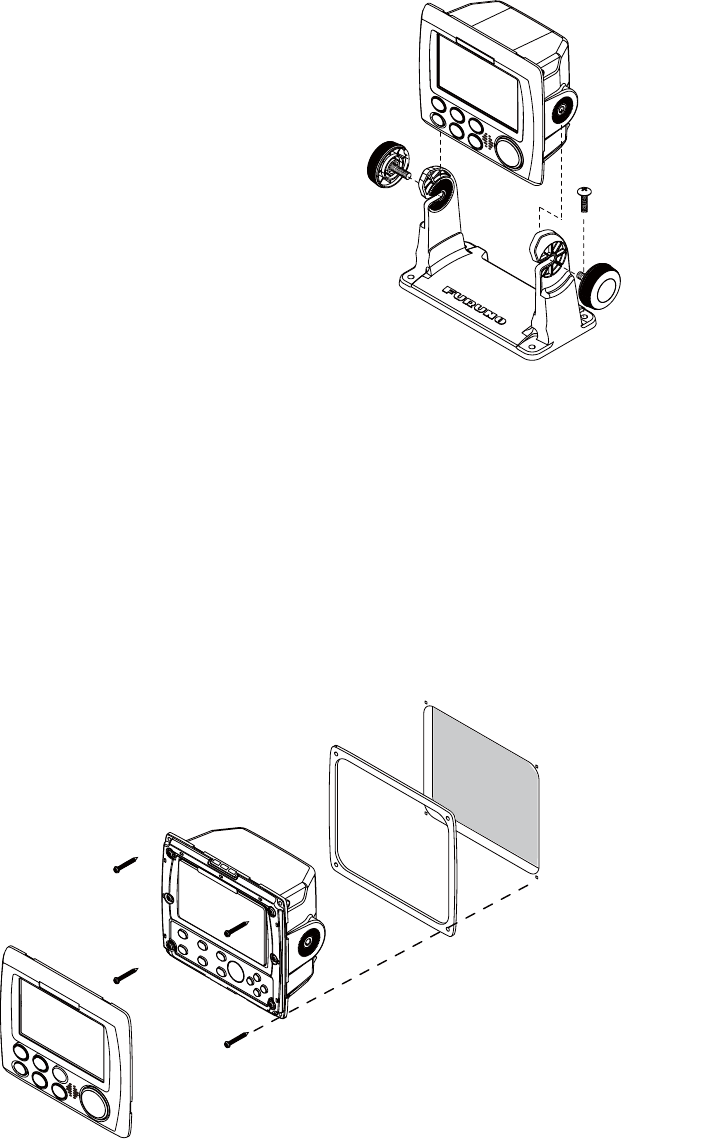
4.3.1 Desktop mount
This mounting method requires the optional hanger.
1. Unscrew knobs to remove the unit from
the hanger.
2. Make four pilot holes (for 5x20 self-tap-
ping screws) in the mounting location.
3. Fix the hanger to the mounting location
with four self-tapping screws (5×20,
supplied).
4. Attach cables to the back of the unit
(see section 4.7.3).
5. Set the unit to the hanger, and fasten
knobs to fix the unit.
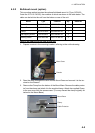
4.3.2 Flush mount
1. Use the template (supplied) to make a hole in the mounting location.
2. Prepare four pilot holes (for 3×20 self-tapping screws) at the mounting location.
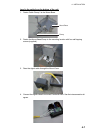
3. Remove the front panel from the unit by unfastening the catches at the rear of the
panel.
4. Set the F mount cushion (supplied) to the hole made at step 1.
5. Connect cables to the unit. (See section 4.7.3).
6. Use four self-tapping screws (3x20, supplied) to fasten the unit to the mounting
location then re-attach the front panel.
MAIN
ALARM
PANEL
Self-tapping
Screw
(5x20, 4 pcs.)
Knob
Hanger
Mounting
Hole
F Mount
Cushion
MAIN
ALARM
PANEL
Self-tapping Screw
(3
x
20, 4 pcs.)
Front Panel