


Registering a URL rewrite rule
Using a URL rewrite module, register a rule to rewrite "original characters" to "rewritten characters":
• Original characters: ^alias name of the virtual directory/(.*)
• Rewritten characters: /alias name of the virtual directory/name of the folder management file
If you use IIS 7, and if the alias name is "ABC" and the folder management file name is "xyz.asp",
the characters become the following:
• Original characters: ^ABC/(.*)
• Rewritten characters: /ABC/xyz.asp
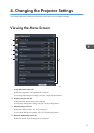
Configuring the Projector
Configure the settings for the projection server in [Projection Server] under [Network Application
Settings] beforehand.
• Validate Projection by Projection Server
Specify to [Enable].
• Server URL
Enter the projection server URL and the alias name of the virtual directory in the following format:
Projection server URL/alias name/{n}
If the projection server URL is "http://hostname" and the alias name is "document", enter "http://
hostname/document".
An IP address can be used as the projection server URL.
If you select [Access Number] in [Access Restriction Type], add "/{n}" at the end of the Server
URL.
Specify other settings in [Projection Server], if necessary.
• To use the projection server function, you must specify the network settings in advance. For details,
see p.53 "Connecting the Projector to a Network".
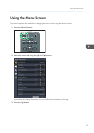
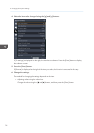
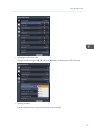
• For details about how to change the settings, see p.73 "Using the Menu Screen". For details
about the setting items, see p.103 "Network Application Settings".
Projecting Files that Are Stored on the Server
Store files to be projected using the projector in the virtual directory on the network server.
If you select [Access Number] in [Access Restriction Type], create a folder whose name is the number
that you specify as Access Number. After this, store the files to be projected in the folder. To project the
files stored in the folder, enter the access number when accessing the projection server.
3. Using the Projector via a Network
68