


Reference Manual
00809-0100-4808, Rev CA
June 2008
Rosemount 3051N
6-4
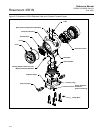
4. Insert the interconnection header in the ten-pin socket exposed by
removal of the jumpers.
5. Remove the two captive screws from the electronics module. To do so,
loosen the screws to release the module, then pull out the screws until
they are stopped by the captive thread inside of the circuit board
standoffs. Continue loosening the screws and remove them.
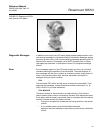
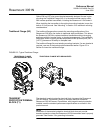
6. If necessary, rotate the electronics housing up to 180 degrees (left or
right) to improve field access or to better view the LCD meter. To rotate
the housing:
a. Loosen the housing rotation set screw using a
9
/64-in.
hex wrench.
b. Turn the housing up to 180 degrees to the left or right of its original
(as shipped) position. Do not rotate the housing more than 180
degrees. Over-rotation will sever the electrical connection
between the sensor module and the electronics module.
c. Retighten the housing rotation set screw.
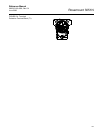
7. Decide which direction to orient the meter. Insert the long meter screws
into the two holes on the meter assembly that coincide with the holes on
the electronics module. You can install the meter in 90-degree
increments for easy viewing. Position one of the four connectors on the
back of the meter assembly to accept the interconnection header.
8. Attach the meter assembly to the electronics module by threading the
screws into the captive threads and attaching the meter assembly to the
interconnection pins. Tighten the screws to secure the meter assembly
and electronics board in place.
9. Attach and tighten the extended cover. Transmitter covers must be fully
engaged to meet explosion proof requirements and to achieve the proper
environmental seal.
Note the following LCD temperature limits:
Operating: 0 to 175 °F (–20 to 80 °C)
Storage: 0 to 185 °F (–40 to 85 °C)
NOTE
Electronics are able to verify alarm current levels. An alarm level test is
recommended before returning the transmitter to service (see “Alarm Level
Verification” in Section 2).