


57
8. Operation
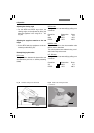
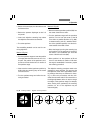
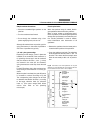
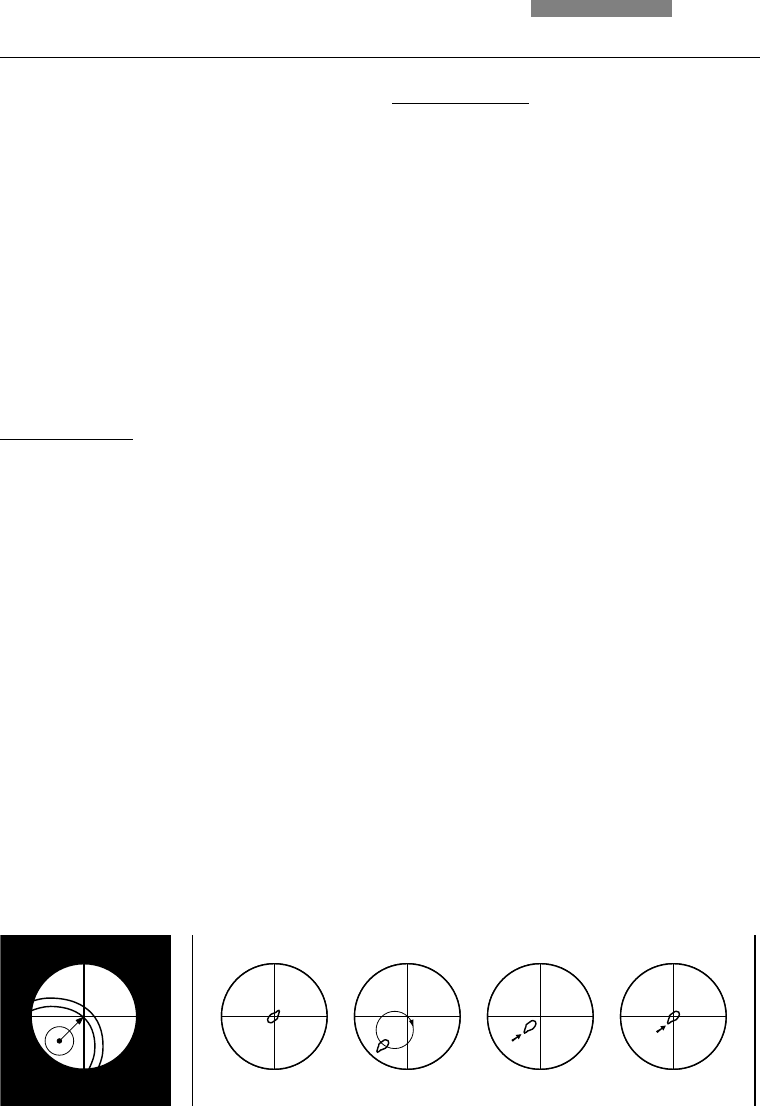
Method II (Fig. 65)
• Move the marked specimen position (65a) into
the center of the M cross-hairs.
• Turn the specimen stage until the specimen
position is as far from the center of the M
cross-hairs as possible (Position A, Fig. 65b).
In extreme cases, point A (= maximum devia-
tion of the specimen position) can also be lo-
cated outside of the field of view.
• Move the image by turning the centering key
until position A of the specimen is located in
the center (= Pos. B) between pos. A and the
center of the M cross-hairs (65c).
• Move position A of the specimen to M and
check to see whether A remains in M when
the stage is rotated (65d). If necessary, repeat
the centering procedure.
The objective centering procedure needs to be
repeated for each objective. This ensures that
the objectives retain their approximate center-
ing settings when they are removed for clean-
ing, or other such procedures, and then rein-
serted into the same holes. If the coarse drive or
the height adjustment device is used to change
the height of the specimen stage (for example,
when viewing thick specimens) the centering
precision for all of the objectives may be
reduced slightly.
• Switch off the analyzer, the 1.6x tube lens and
the Bertrand lens.
• Reduce the aperture diaphragm so that it is
very small.
• Insert both objective centering keys above
the objectives that need to be centered.
• Focus the specimen.
Two resembling methods can be used for cen-
tering objectives:
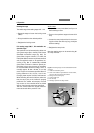
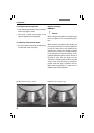
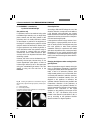
Method I (Fig. 64)
• Turn the specimen stage and note the position
of the specimen that does not move in a circu-
lar path. This position of the specimen corre-
sponds to the mechanical axis of rotation of
the specimen stage.
• Now move the marked specimen position by
shifting the two centering keys to the center
of the cross-hairs.
• Turn the specimen stage and refine the cen-
tering as needed.
Fig. 65 Centering method II
Fig. 64 Centering method I
M M
A
M
A
B
M
A
B
abcd