43
7. Startup
Adjusting the field diaphragm
• Close the field diaphragm with the FD button
(38.4) or manually until the edge of the dia-
phragm (round or rectangular) appears in the
field of view.
• If the border of the field diaphragm does not
appear in the middle of the field of view, the
field diaphragm must be moved into the
middle of the field of view using the two
centering screws (42a.1) on the right side of
the stand.
• Use the function buttons FD (38.4) to open the
field diaphragm to the point that they just dis-
appear from the field of view.
• We recommend the use of a rectangular field
diaphragm when using a digital camera.
Match the size of the diaphragm to the chip
size of the camera.
Adjusting the aperture diaphragm
(for DM4000 M and DM4500 P only)
• Remove one eyepiece (e.g. right).
• Close the aperture diaphragm with the AP
function key (38.2) until the edge of the dia-
phragm appears in the exit pupil of the objec-
tive (aperture diaphragm plane).
• If the image is not in the middle of the field of
view of the exit pupil, move the position of the
aperture diaphragm to the center of the exit
pupil using the two centering screws (42b.2)
located on the left side of the stand.
• Open the aperture diaphragm to cover 2/3 of
the field of view.
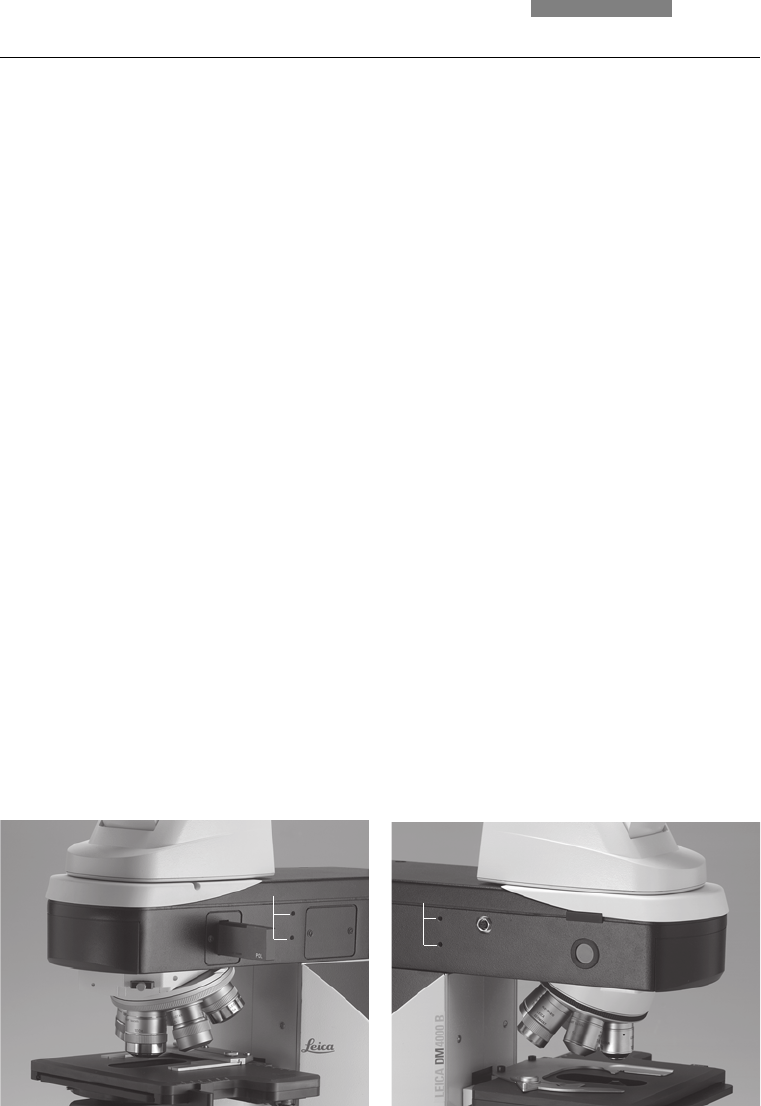
Fig. 42a Adjusting the field diaphragm in the incident light
axis
1 Adjusting screws for moving the field diaphragm
Fig. 42b Adjusting the aperture diaphragm in the incident
light axis
1 Adjusting screws for moving the aperture diaphragm
1
1


