


Instruction Manual
IM-106-880, Rev 1.0
January 2007
OCX 8800
6-16
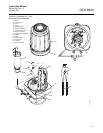
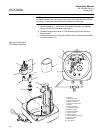
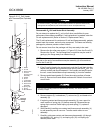
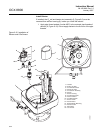
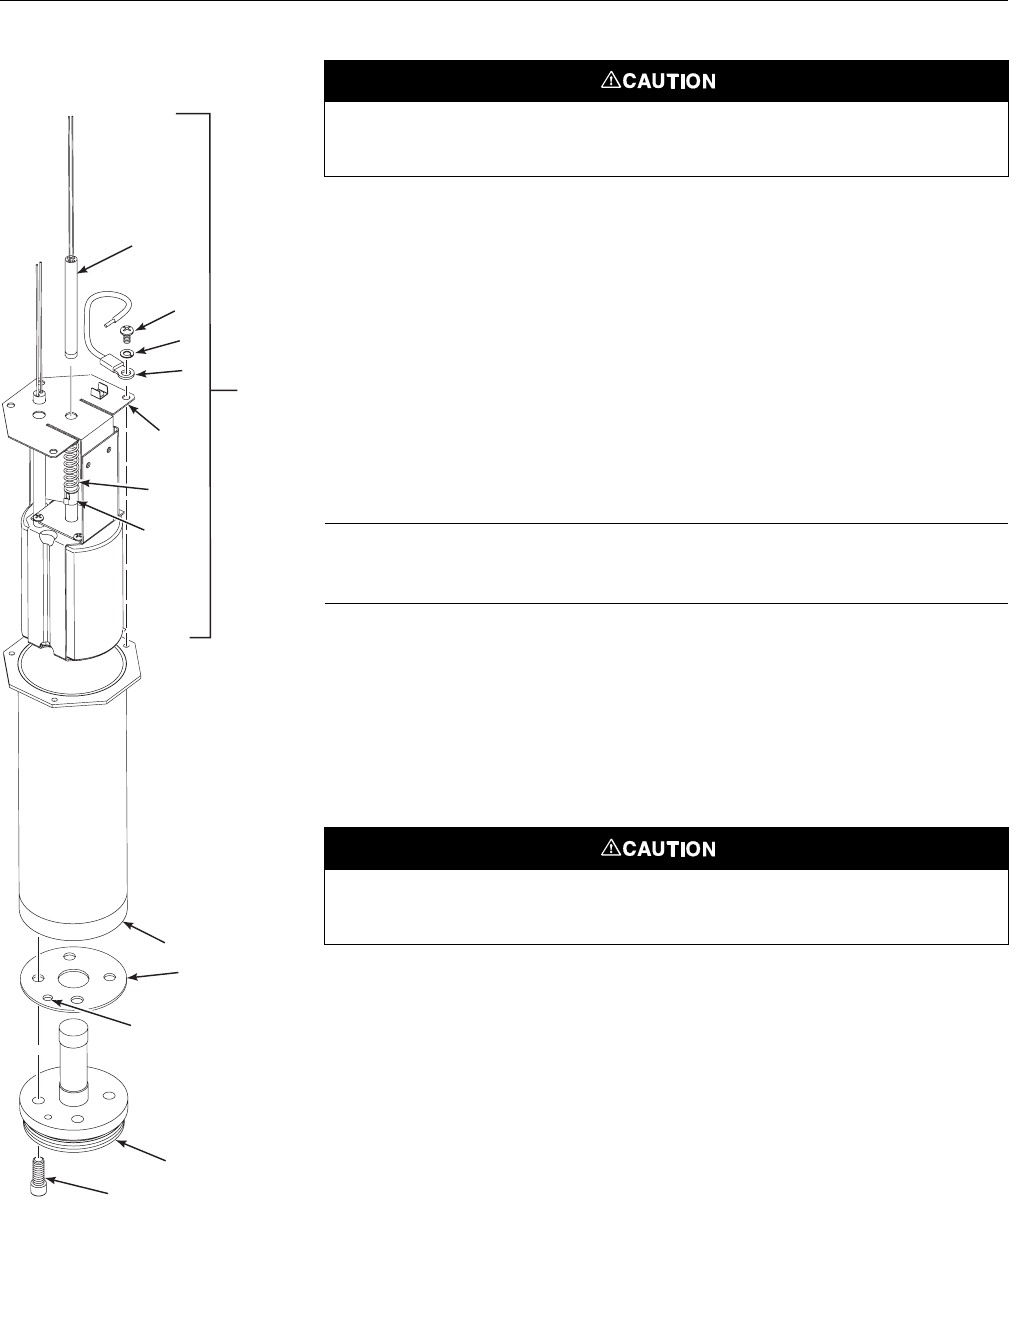
Figure 6-12. O
2
Cell, Heater,
and Thermocouple, Exploded
View
Disassemble O
2
Cell and Heater Strut Assembly
Do not attempt to replace the O
2
cell until all other possibilities for poor
performance have been considered. If cell replacement is needed, order the
O
2
cell replacement kit (Refer to Section 8, Replacement Parts).
The O
2
cell replacement kit contains an O
2
cell and flange assembly, gaskets,
socket head cap screws, and anti-seize compound. The items are carefully
packaged to preserve precise surface finishes.
Do not remove items from the package until they are ready to be used.
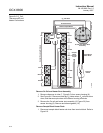
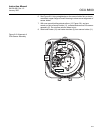
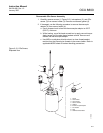
1. Remove the four allen cap screws (1, Figure 6-12) from the O
2
cell (2).
Remove the O
2
cell. The cell flange has a notch that may be used to
gently pry the flange away from heater tube (3).
NOTE
The pad on the end of contact/thermocouple assembly (4) will sometimes
fuse to the O
2
cell (2).
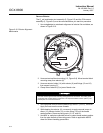
2. If the O
2
cell is fused to the contact pad, push the O
2
cell back into the
heater tube (against spring pressure) and quickly twist the O
2
cell. The
cell and contact pad should separate. If the contact pad stays fused to
the cell, a new contact/thermocouple assembly (4) must be installed.
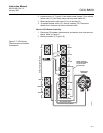
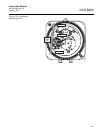
3. Remove and discard gasket (5). Clean the mating surface of heater
tube (3). Remove burrs and raised surfaces with a block of wood and
crocus cloth.
4. Remove screws (6), lockwashers (7), return wire (8), and heater strut
assembly (9).
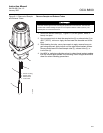
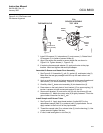
5. If replacing contact and thermocouple assembly (4), use a pencil to
mark location of spring clip (10) before removing. Squeeze tabs on
spring clip to remove. Retain spring clip and spring (11); replace if
damaged.
6. While carefully handling new contact and thermocouple assembly (4)
lay old assembly next to new one. Transfer match marks to new
assembly.
7. Carefully guide new contact and thermocouple assembly (4) through
strut bracket (12), spring (11), and spring clip (10) until spring clip
reaches pencil mark.
37390032
10
11
12
4
6
7
8
9
3
5
2
1
1. Screw
2. O Cell
3. Heater Tube
4. Contact/
Thermocouple
Assembly
5. Gasket
6. Screw
7. Lockwasher
8. Return Wire
9. Heater Strut
Assembly
10. Spring Clip
11. Spring
12. Strut Bracket
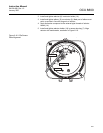
2
Test Gas
Passage
Holes
Do not remove the O
2
cell unless you are certain it needs to be replaced. Removal may
damage the cell and platinum pad. Remove the O
2
cell for cell replacement only.
Use care when handling contact and thermocouple assembly. The ceramic rod in this
assembly is fragile.