C2907M-D (4/05) 23
Hardware Installation
Refer to
Appendix A
for examples of how to connect equipment.
MOUNTING THE NET350 TO THE WALL
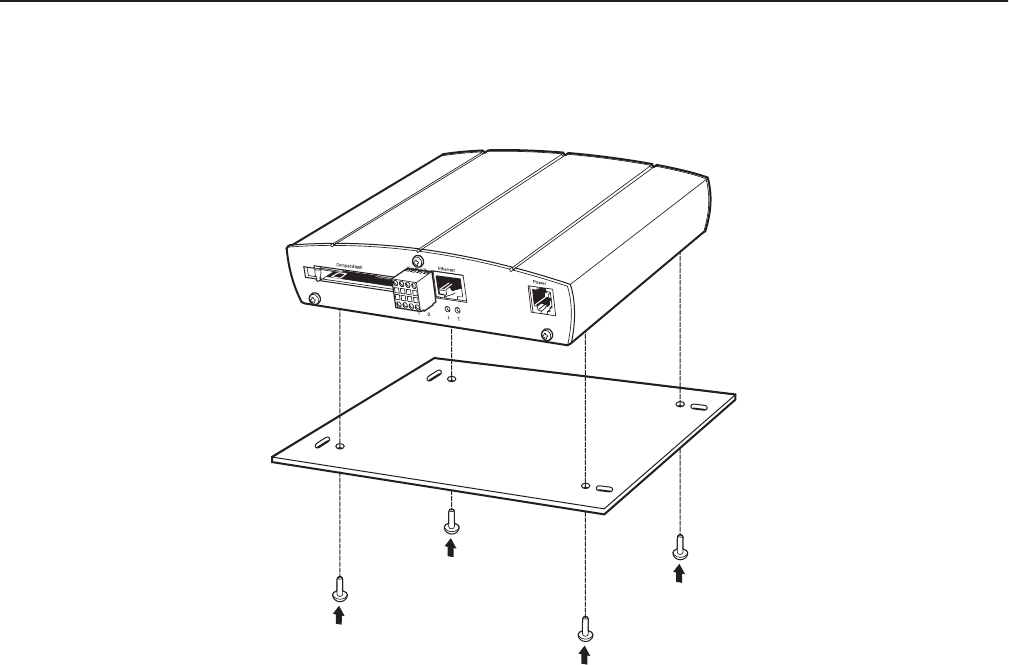
Figure 17.
Securing NET350 to Wall Mount Bracket
If desired, the NET350 can be mounted to a wall using the supplied wall mount bracket. To do so:
1. Pry off the clear plastic feet from the bottom of the NET350 unit. (Note the grooves on the underside of the unit. They are involved later in
securing the unit to the wall mount bracket.)
2. Refer to Figure 17. Align the grooves on the underside of the NET350 with the four smaller holes in the mount. Install four screws (supplied)
through the holes in the bottom of the wall mount. The screws fit in the grooves. Tighten carefully to secure the NET350 to the wall mount.
DO NOT OVER-TIGHTEN; the screws can damage the aluminum grooves.
3. Attach the mount to the wall with four screws (customer supplied) through the mount’s oblong holes. The mount can be attached to the
wall with any side of the NET350 pointing up.
CONNECTING VIDEO SOURCES OR DISPLAYS
• The BNC Video In socket of the NET350T transmitter accepts color or black-white sources and automatically detects whether it is PAL or
NTSC. The video input has an external switch for termination of 75 ohms.
• The Video Out BNC socket of the NET350R receiver can be connected to any PAL or NTSC video monitor or VCR with a composite PAL or
NTSC input. You must select NTSC or PAL on the configuration page for video decoder settings for the NET350R.
• If the video signal is not looped through, terminate the video input by setting the “75
Ω
” slide switch (located on the front of the
transmitter) to the right.


