


35
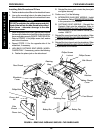
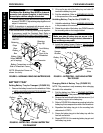
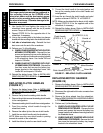
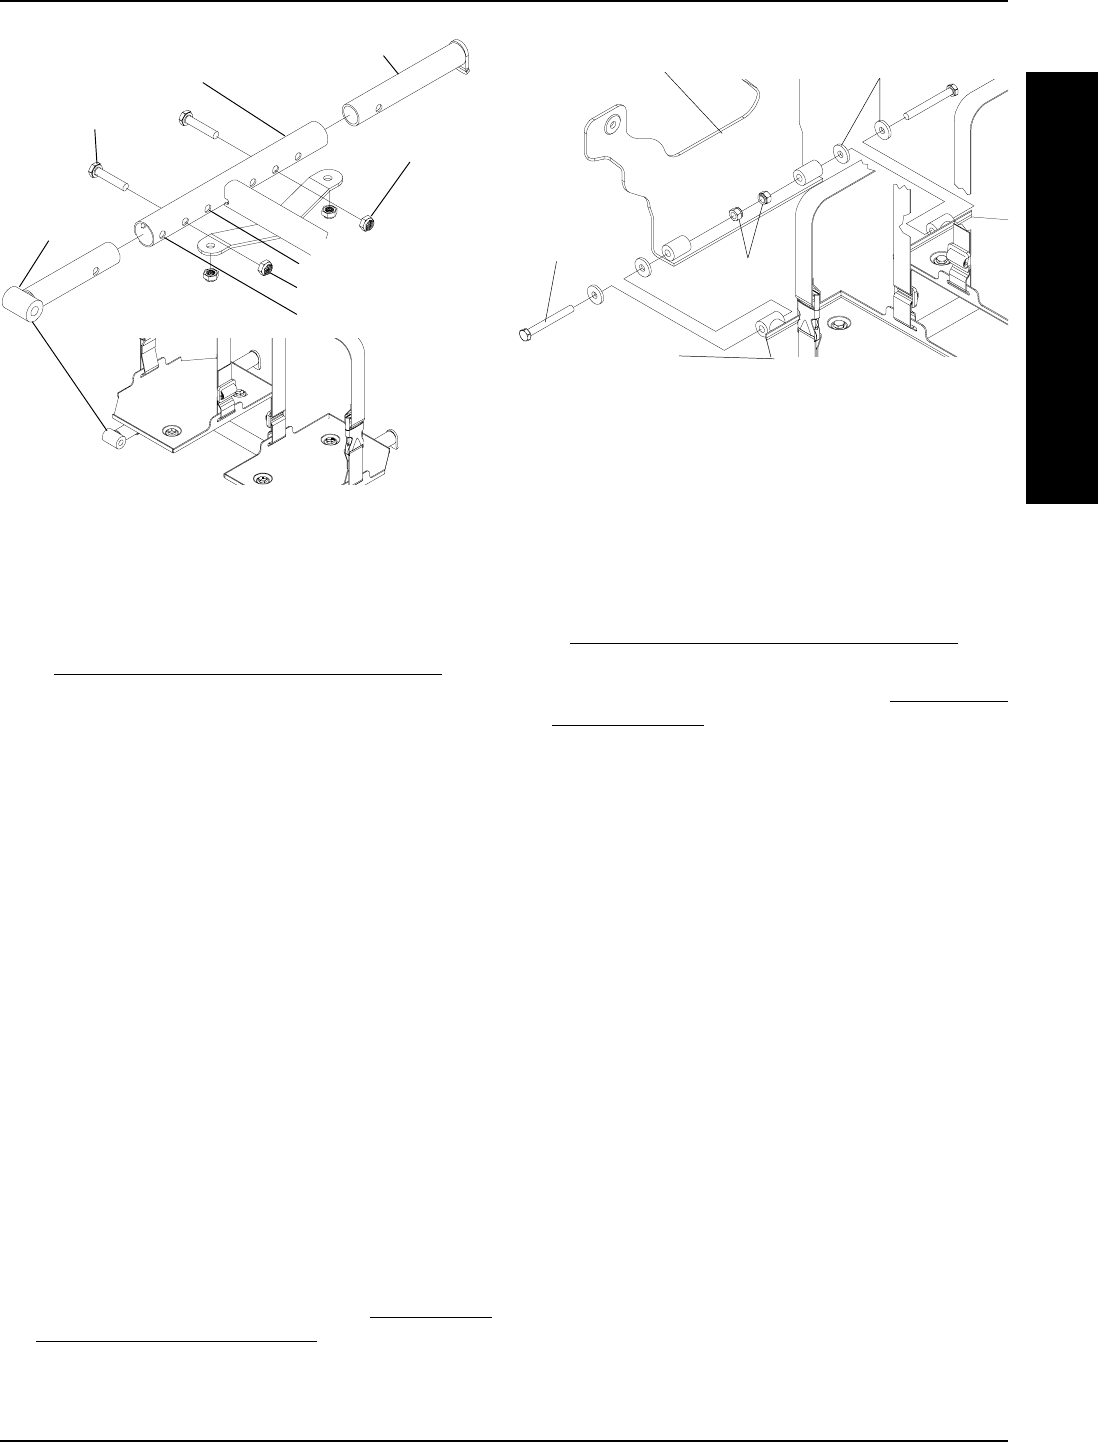
FIGURE 23 - BATTERY TRAY - REMOVING/
INSTALLING BATTERY TRAY
Battery Tray Hanger Bracket
Battery Tray
Hex Bolts
Locknuts
Washers
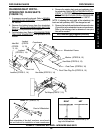
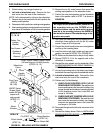
Replacing Right Battery Tray Hanger Bracket
(FIGURE 24)
NOTE: Right and left is determined by sitting in the wheel-
chair.
1. Remove the battery boxes from the wheelchair. Refer
to
INSTALLING/REMOVING BATTERY BOXES in this
procedure of the manual.
2. Remove the battery tray. Refer to
REMOVING
BATTERY TRAY in this procedure of the manual.
3. Perform one (1) of the following:
A. WHEELCHAIR EQUIPPED WITH FLIP-UP
REMOVABLE FOOTBOARD - Remove the hex
screw and spacer that secures the existing right
battery tray hanger bracket and footboard
mounting bracket to the wheelchair frame.
B. WHEELCHAIR NOT EQUIPPED WITH FLIP-UP
REMOVABLE FOOTBOARD - Remove the front
hex screw that secures the existing right battery
tray hanger bracket to the wheelchair frame.
4. Remove the rear hex bolt that secures the existing right
battery tray hanger bracket to the wheelchair.
NOTE: NOTE hex screw size for reinstallation.
5. Remove the existing right battery tray hanger bracket
from the wheelchair.
6. Line up the mounting holes in the new battery tray
hanger bracket with the mounting holes in the
wheelchair frame.
7. Perform one (1) of the following:
A. WHEELCHAIR EQUIPPED WITH FLIP-UP
REMOVABLE FOOTBOARD - Reinstall the hex
screw and spacer that secures the new right
battery tray hanger bracket and footboard
mounting bracket to the wheelchair frame. Use
Loctite 242 and torque to 156-in/lbs.
Removing Battery Tray (FIGURE 23)
1. Remove the battery boxes from the wheelchair. Refer
to
INSTALLING/REMOVING BATTERY BOXES in this
procedure of the manual.
2. Remove the two (2) hex bolts and locknuts that secure
the existing battery tray and washers to the battery tray
hanger bracket.
3. Remove the existing battery tray from the wheelchair.
Installing Battery Tray (FIGURE 23)
1. Line up the mounting holes in the new/existing
battery tray with the mounting holes in the battery
tray hanger bracket.
2. Position one (1) of the washers between the battery
hanger bracket and the new/existing battery tray.
3. Reinstall one (1) of the hex bolts and washers through
the new/existing battery tray, washer and battery tray
hanger bracket and loosely tighten with one (1) of
the locknuts.
4. Repeat STEPS 2-3 for the remaining washers, hex
bolt, and locknut.
5. Tighten the two (2) hex bolts and locknuts.
NOTE: Tighten the Two (2) hex bolts and locknuts until
the tray stays up by itself. Over tightening the hex bolts
and locknuts will make the battery tray difficult to flip up.
6. Reinstall the battery boxes. Refer to INSTALLING/
REMOVING BATTERY BOXES in this procedure of
the manual.
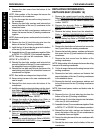
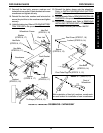
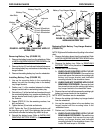
FIGURE 22 - BATTERY TRAY - CHANGING WIDTH OF
BATTERY TRAY
18-inch Wheelchair
20-inch Wheelchair
Battery Tray Pin
Battery Tray
Hex Bolts
Locknuts
16-inch Wheelchair
Battery Tray
Pivot
F
W
D
W
H
E
E
L
C
H
A
I
R
S
PROCEDURE 8FWD WHEELCHAIRS